End-to-End Data Pipeline Series: Tutorial 8 - Sidetrek

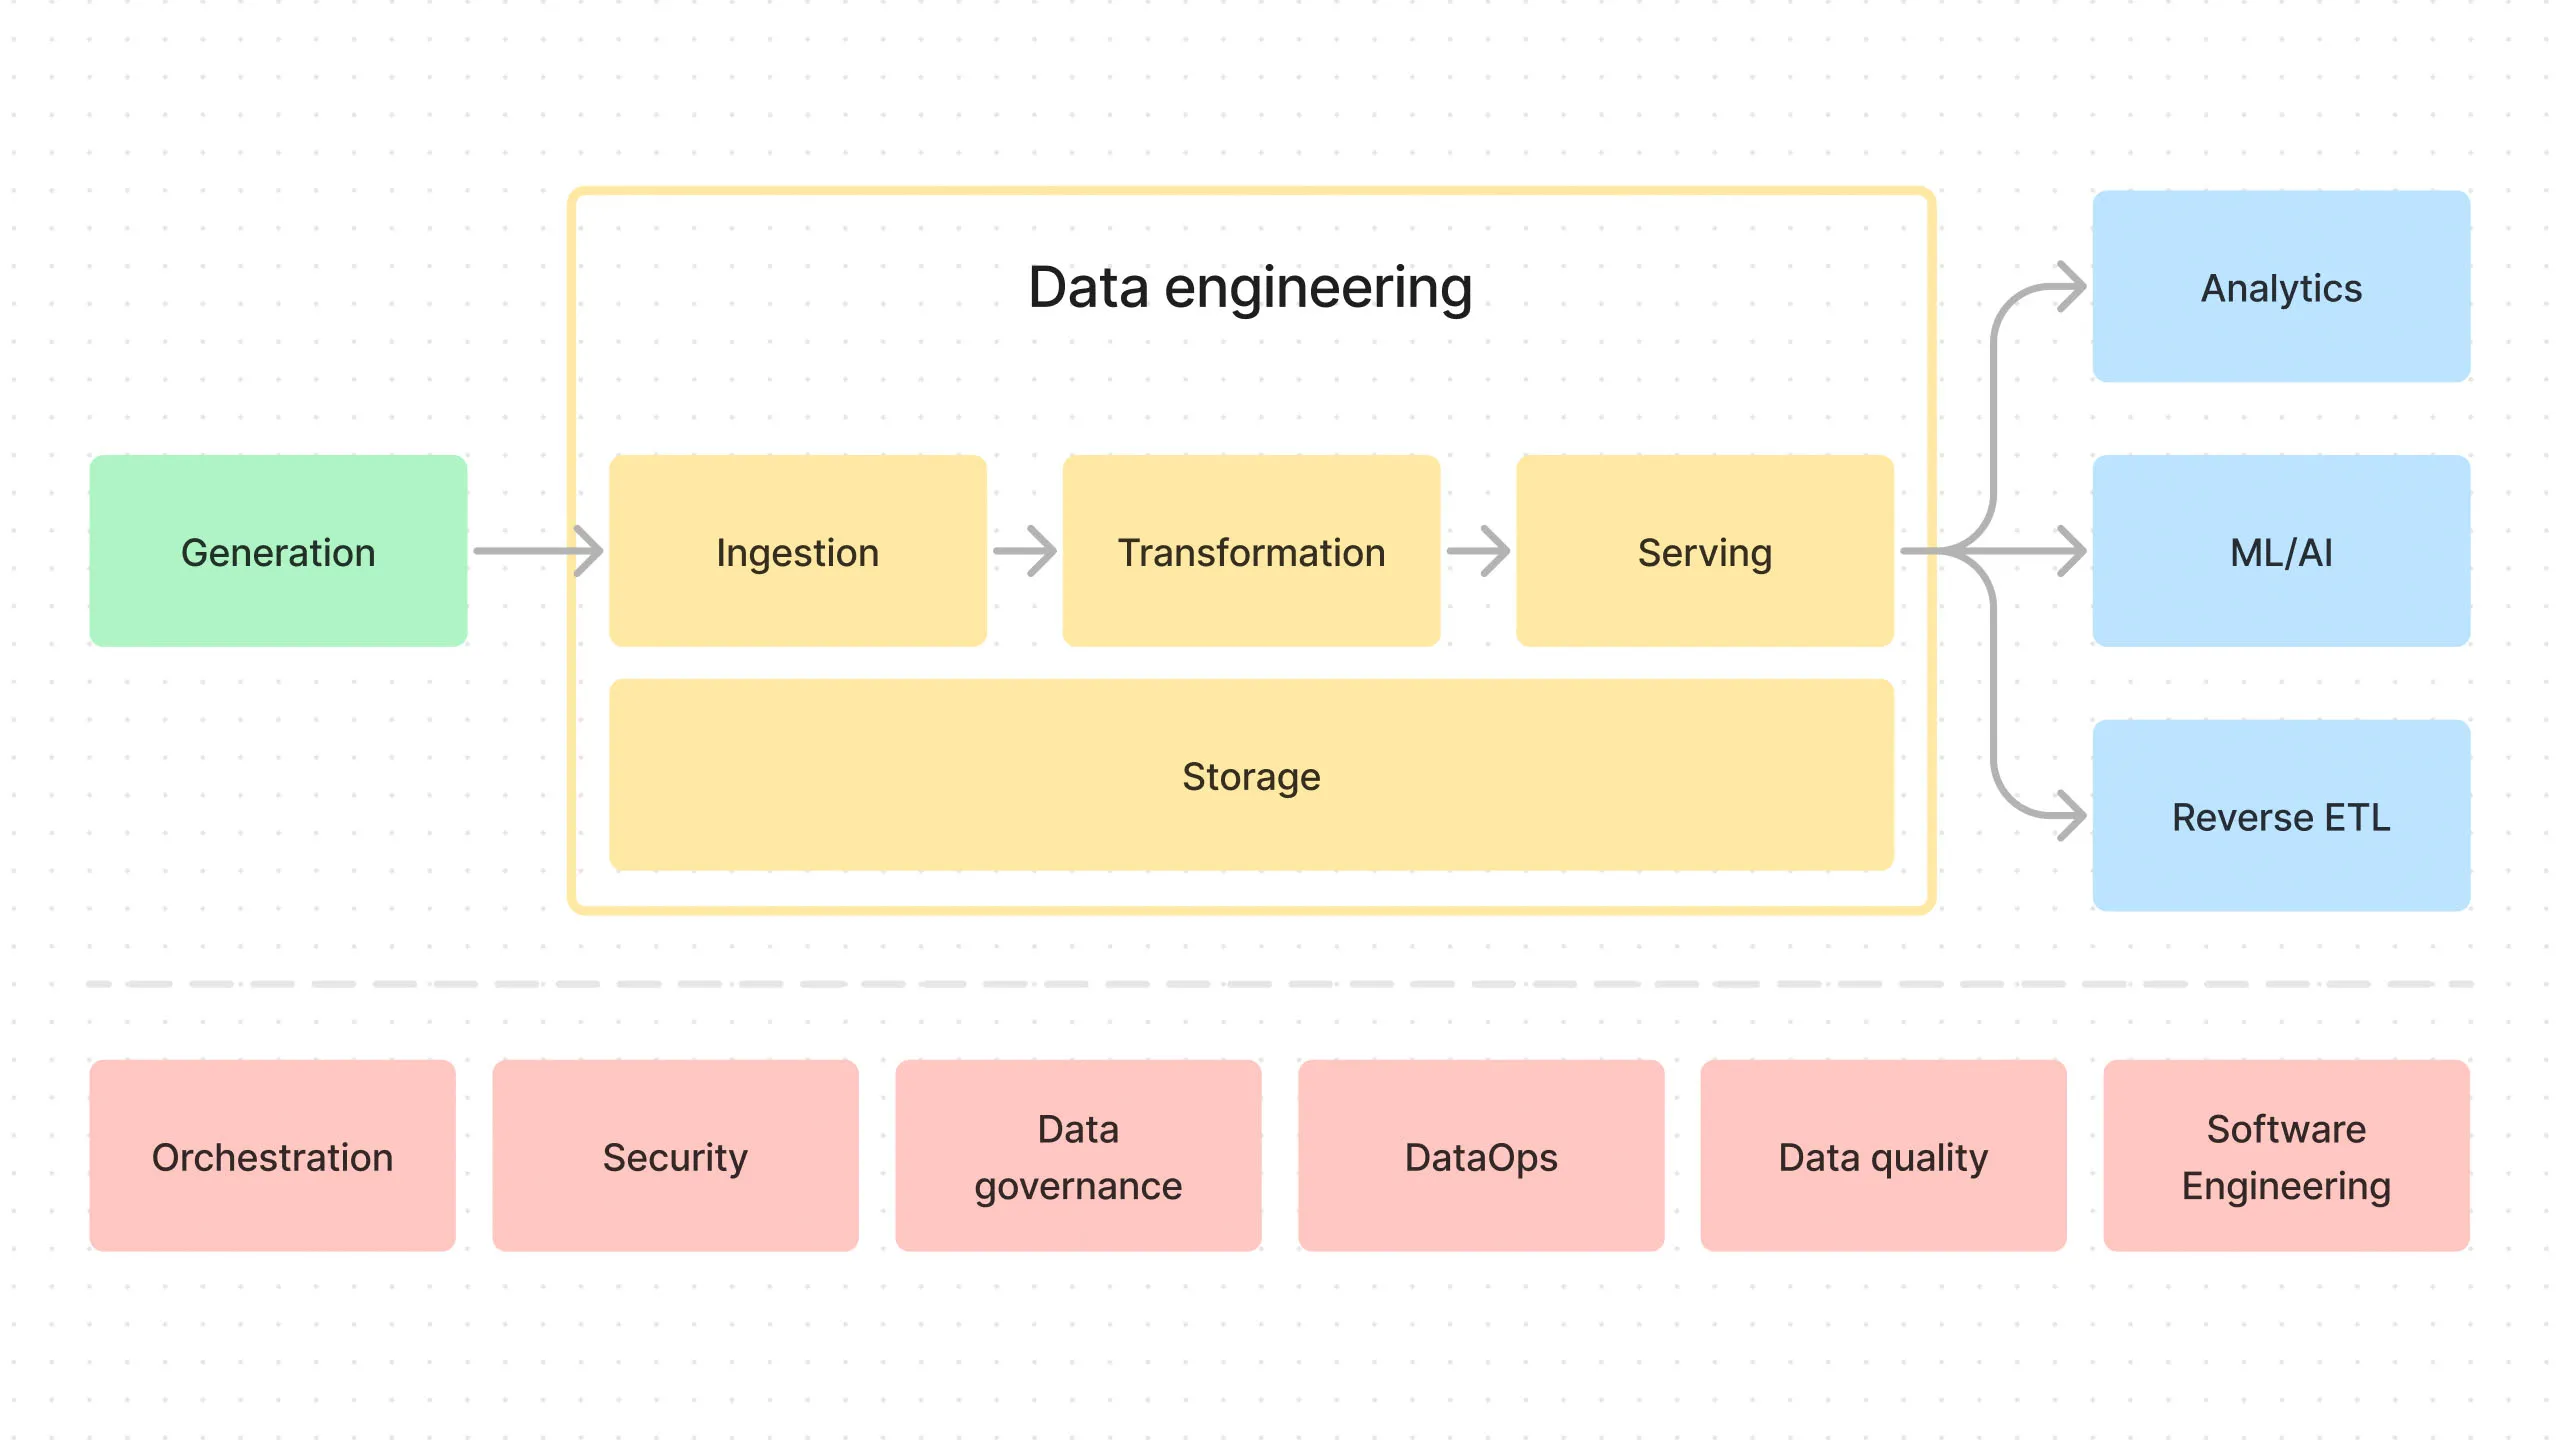
Welcome back!
This is the final post in a series where we’ll build an end-to-end data pipeline together.
Today, we’re going to see how to use the open-source tool Sidetrek to build the end-to-end data pipeline in just a few minutes.
- Introduction to End-to-End Data Pipeline
- Data Storage with MinIO/S3 and Apache Iceberg
- Data Ingestion with Meltano
- Data Transformation with DBT and Trino - Part 1
- Data Transformation with DBT and Trino - Part 2
- Data Orchestration with Dagster
- Data Visualization with Superset
- Building end-to-end data pipeline with Sidetrek (this post)
If you want to view the code for this post, you can find it here.
What is Sidetrek?
Sidetrek is an open-source CLI tool that helps you build and run an end-to-end data pipeline.
Let’s see how to use Sidetrek to build the data pipeline we’ve been working on in this series.
Prerequisites
Make sure you have the following installed on your machine:
- Python version 3.10-3.11
- Poetry
- git CLI
For Trino, default minimum required memory is 16GB (although this setting can be changed after project initialization).
Install Sidetrek
Run this code in the terminal to install Sidetrek:
IMPORTANT FOR LINUX USERS: Make sure you can run Docker without sudo. To verify this, please run docker run hello-world (without sudo!) to make sure it succeeds.
If this doesn’t work, you may need to add your user to docker group first:
Initialize Your Data Project
Run this code in the terminal to initialize your data project:
Follow the prompts to set up your project - for example:
Sidetrek requires Python 3.10-3.11, Poetry, git and Docker >24 installed. Are you ready to continue? > Yes
Which python version would you like to use? > 3.11
Awesome! What would you like to name your project? > e2e_bi_tutorial
Which data stack would you like to build? > Dagster, Meltano, DBT, Iceberg, Trino, and Superset
Would you like to include example code? > Yes
After a couple of minutes, you should see e2e_bi_tutorial directory created with all the tools already set up and installed.
This is roughly how the directory structure should look like:
e2e_bi_tutorial
├── .sidetrek
├── .venv
├── superset
├── trino
└── e2e_bi_tutorial
    ├── dagster
    ├── data
    ├── dbt
    └── meltano
Explore the Data Pipeline
Because we said yes to the example code, we have everything we need to ingest, transform, and visualize the example dataset in e2e_bi_tutorial/e2e_bi_tutorial/data.
Step 1: Start Sidetrek
Start this code in the terminal to run Sidetrek:
This runs all the services in docker-compose.yaml (MinIO, Trino, Iceberg, Superset) and runs the Dagster UI at http://localhost:3000.
Step 2: Run the Meltano Ingestion Job in Dagster
Let’s run the Meltano ingestion job in Dagster to load the example dataset into Iceberg tables.
- Go to the Dagster dashboard at http://localhost:3000 and click on the
run_csv_to_iceberg_meltano_jobjob
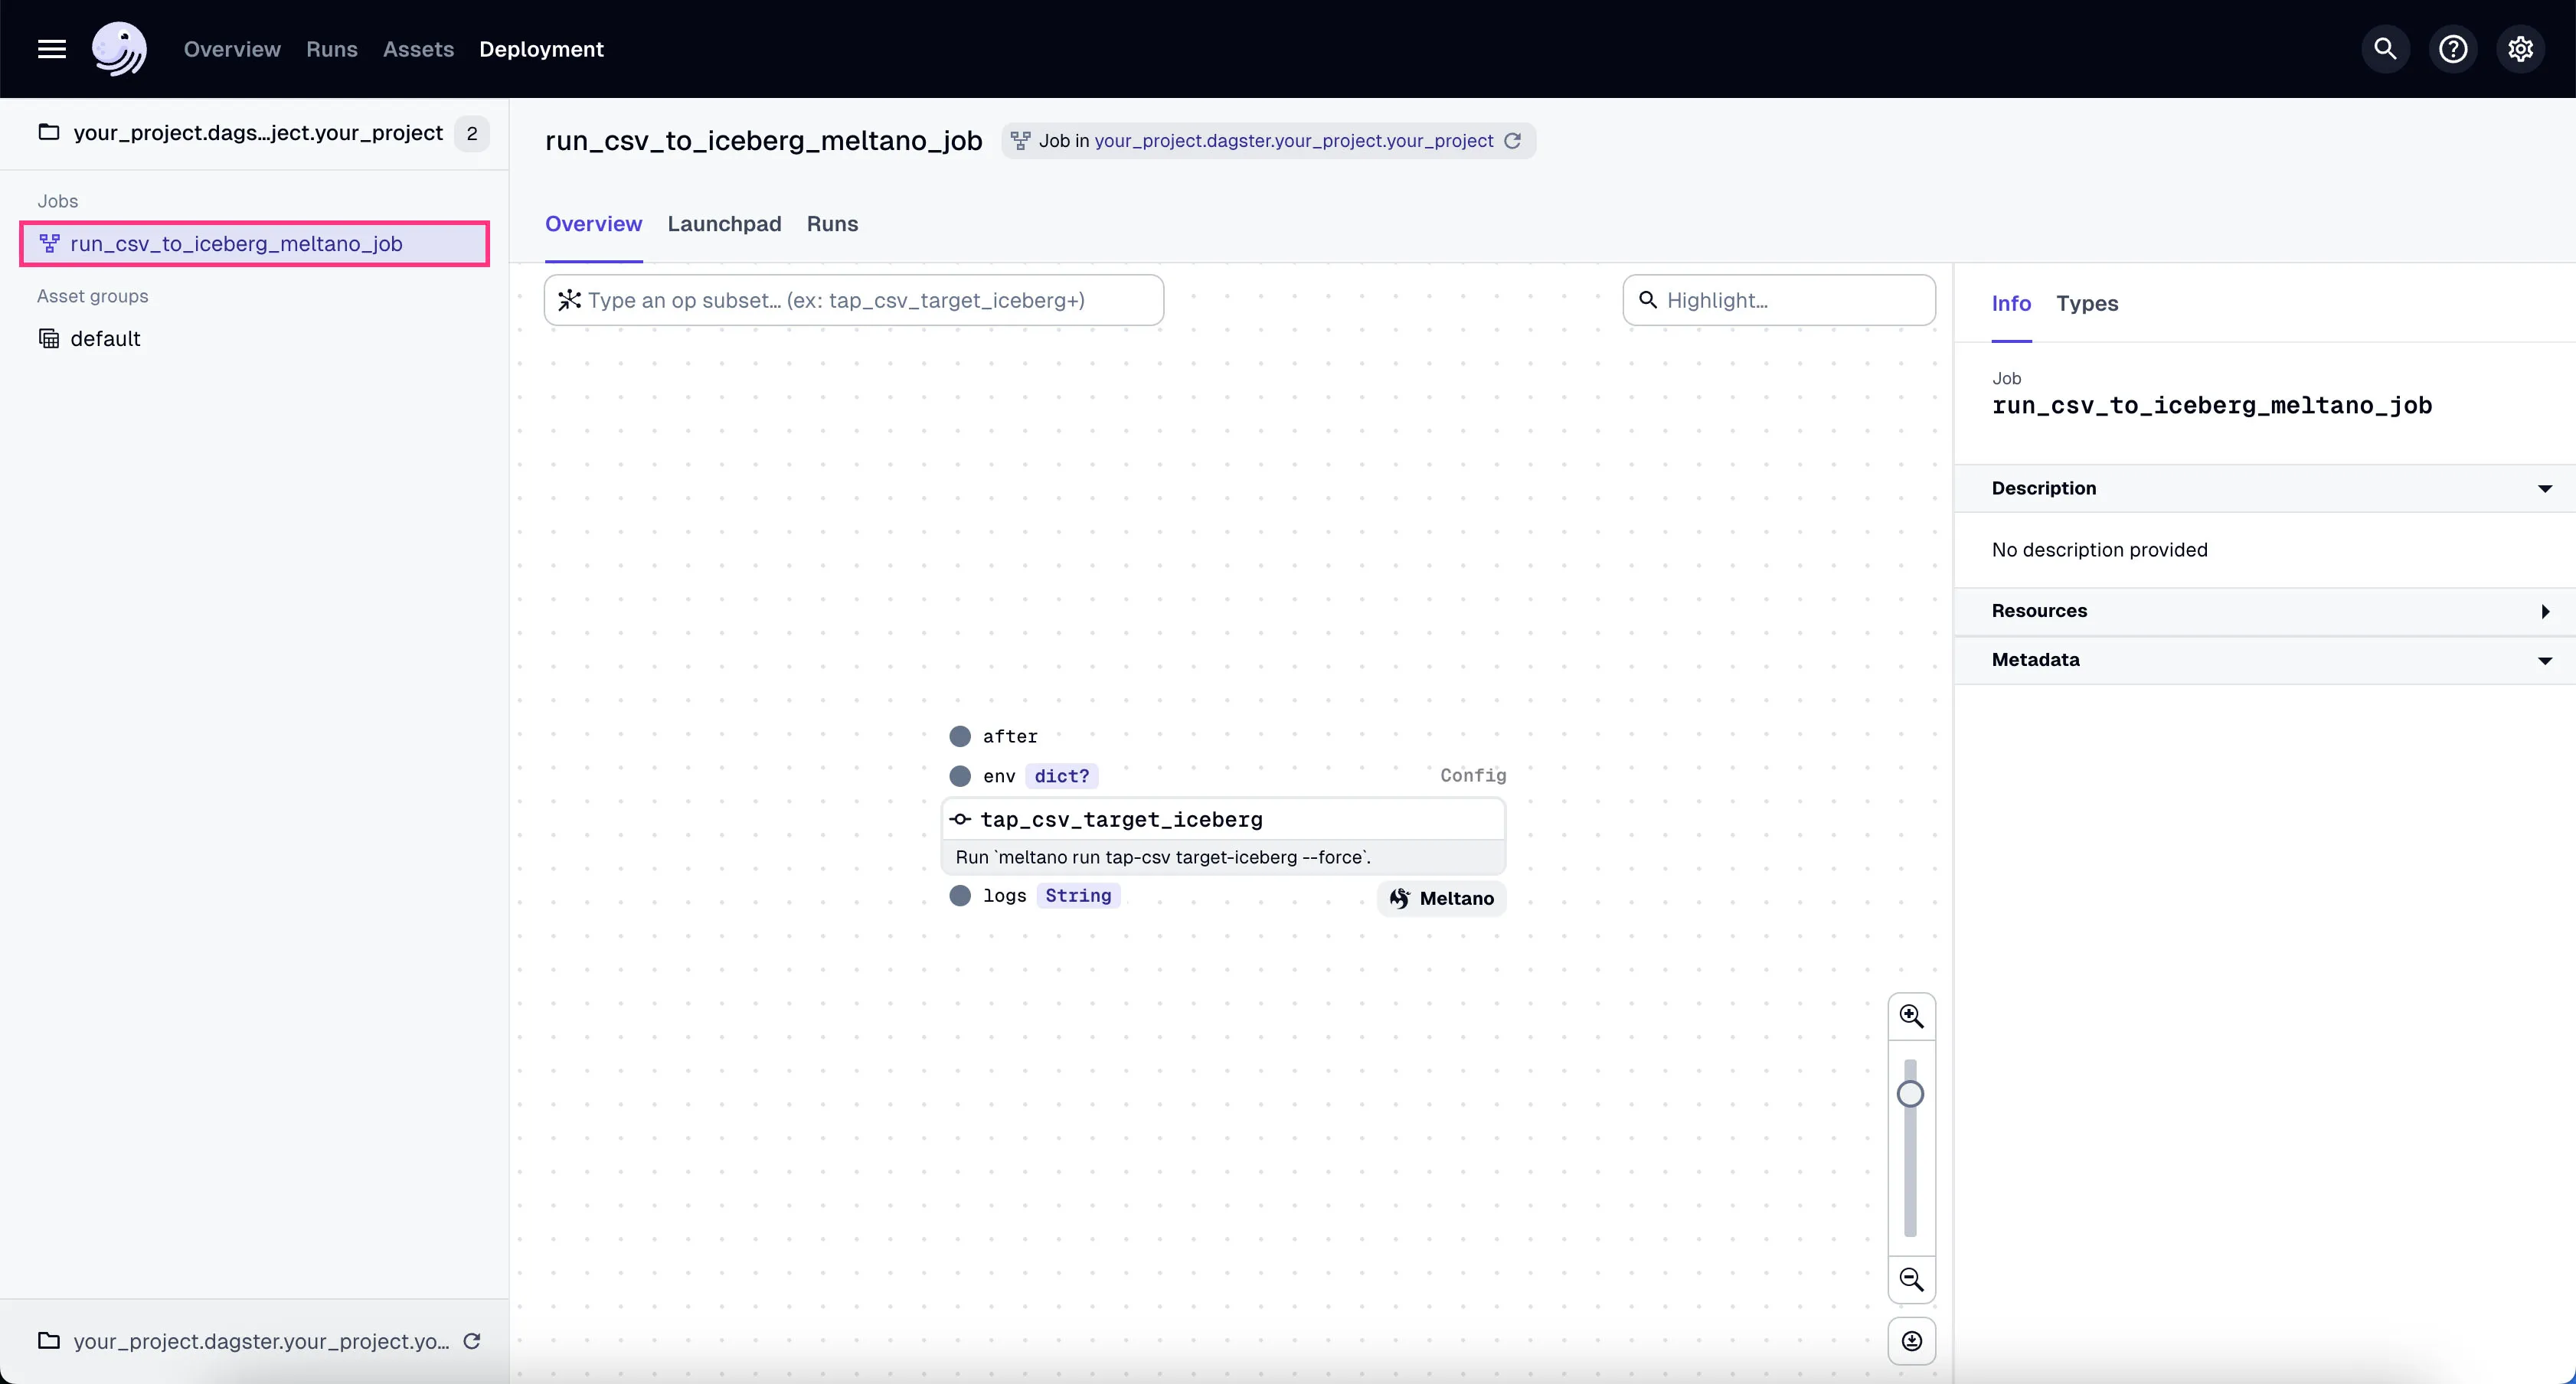
- Go to the tab “Launchpad” and click “Launch Run”.
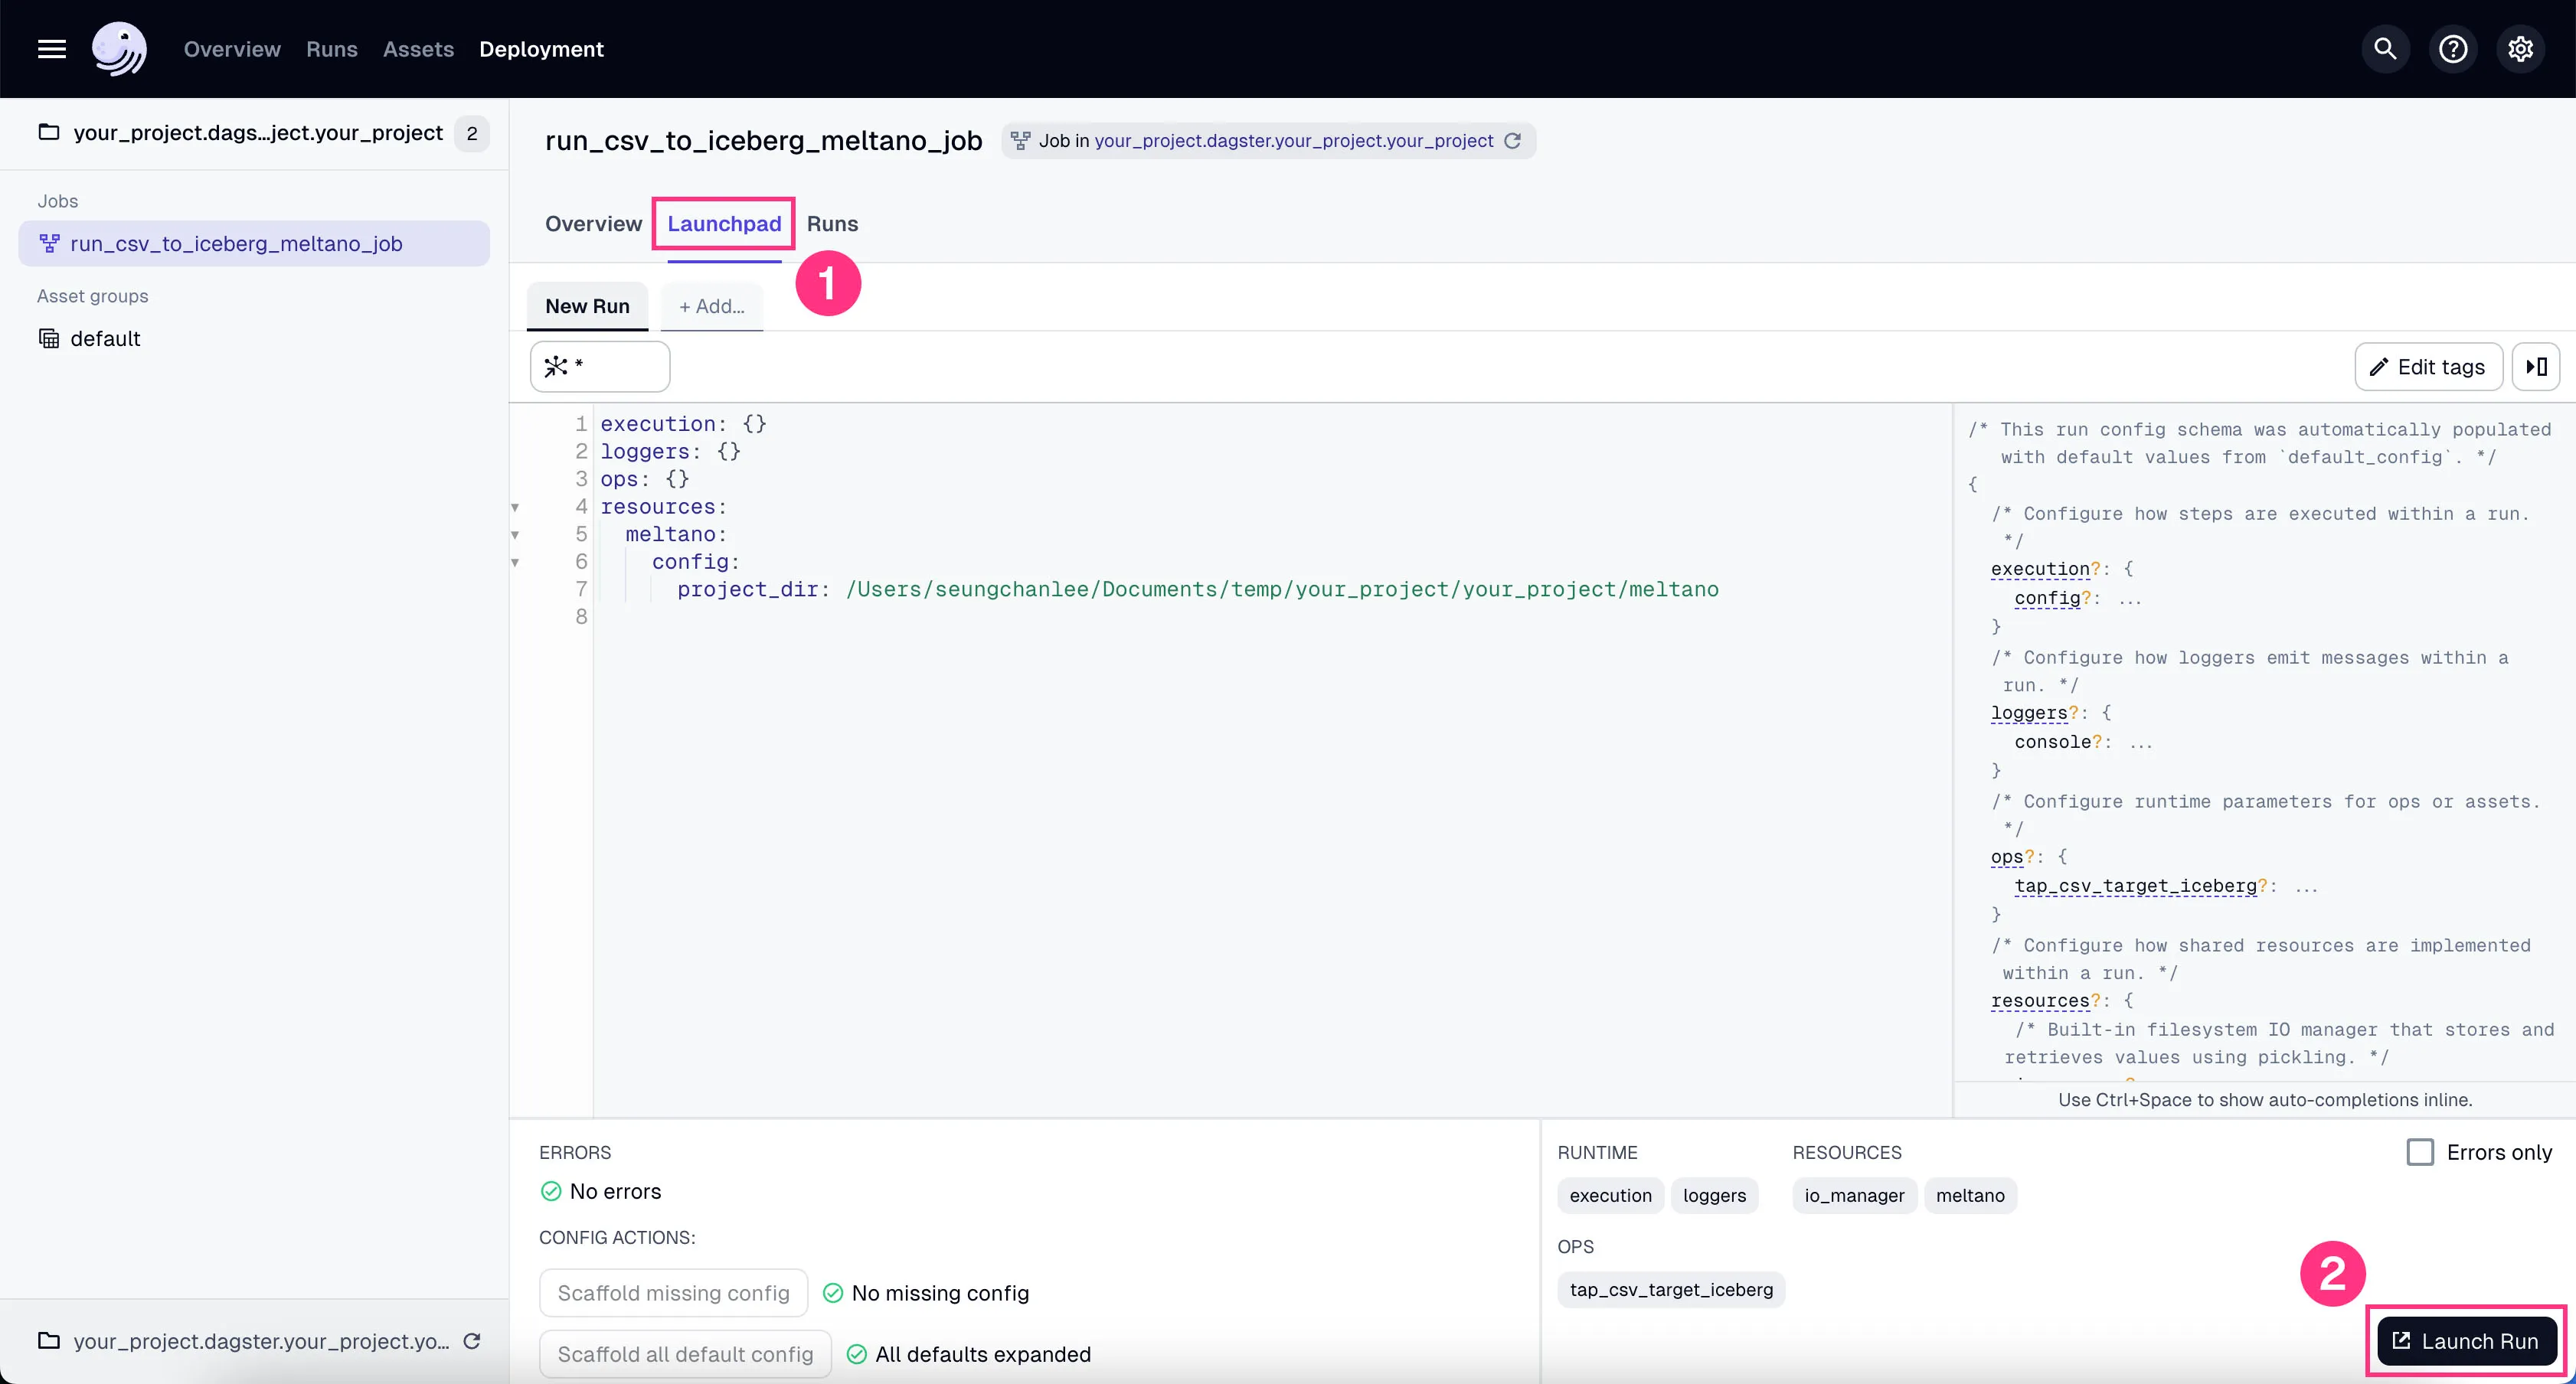
You’ll see the job starts running. It might take a couple of minutes to finish the ~100k+ rows of data we’re using in our example project.
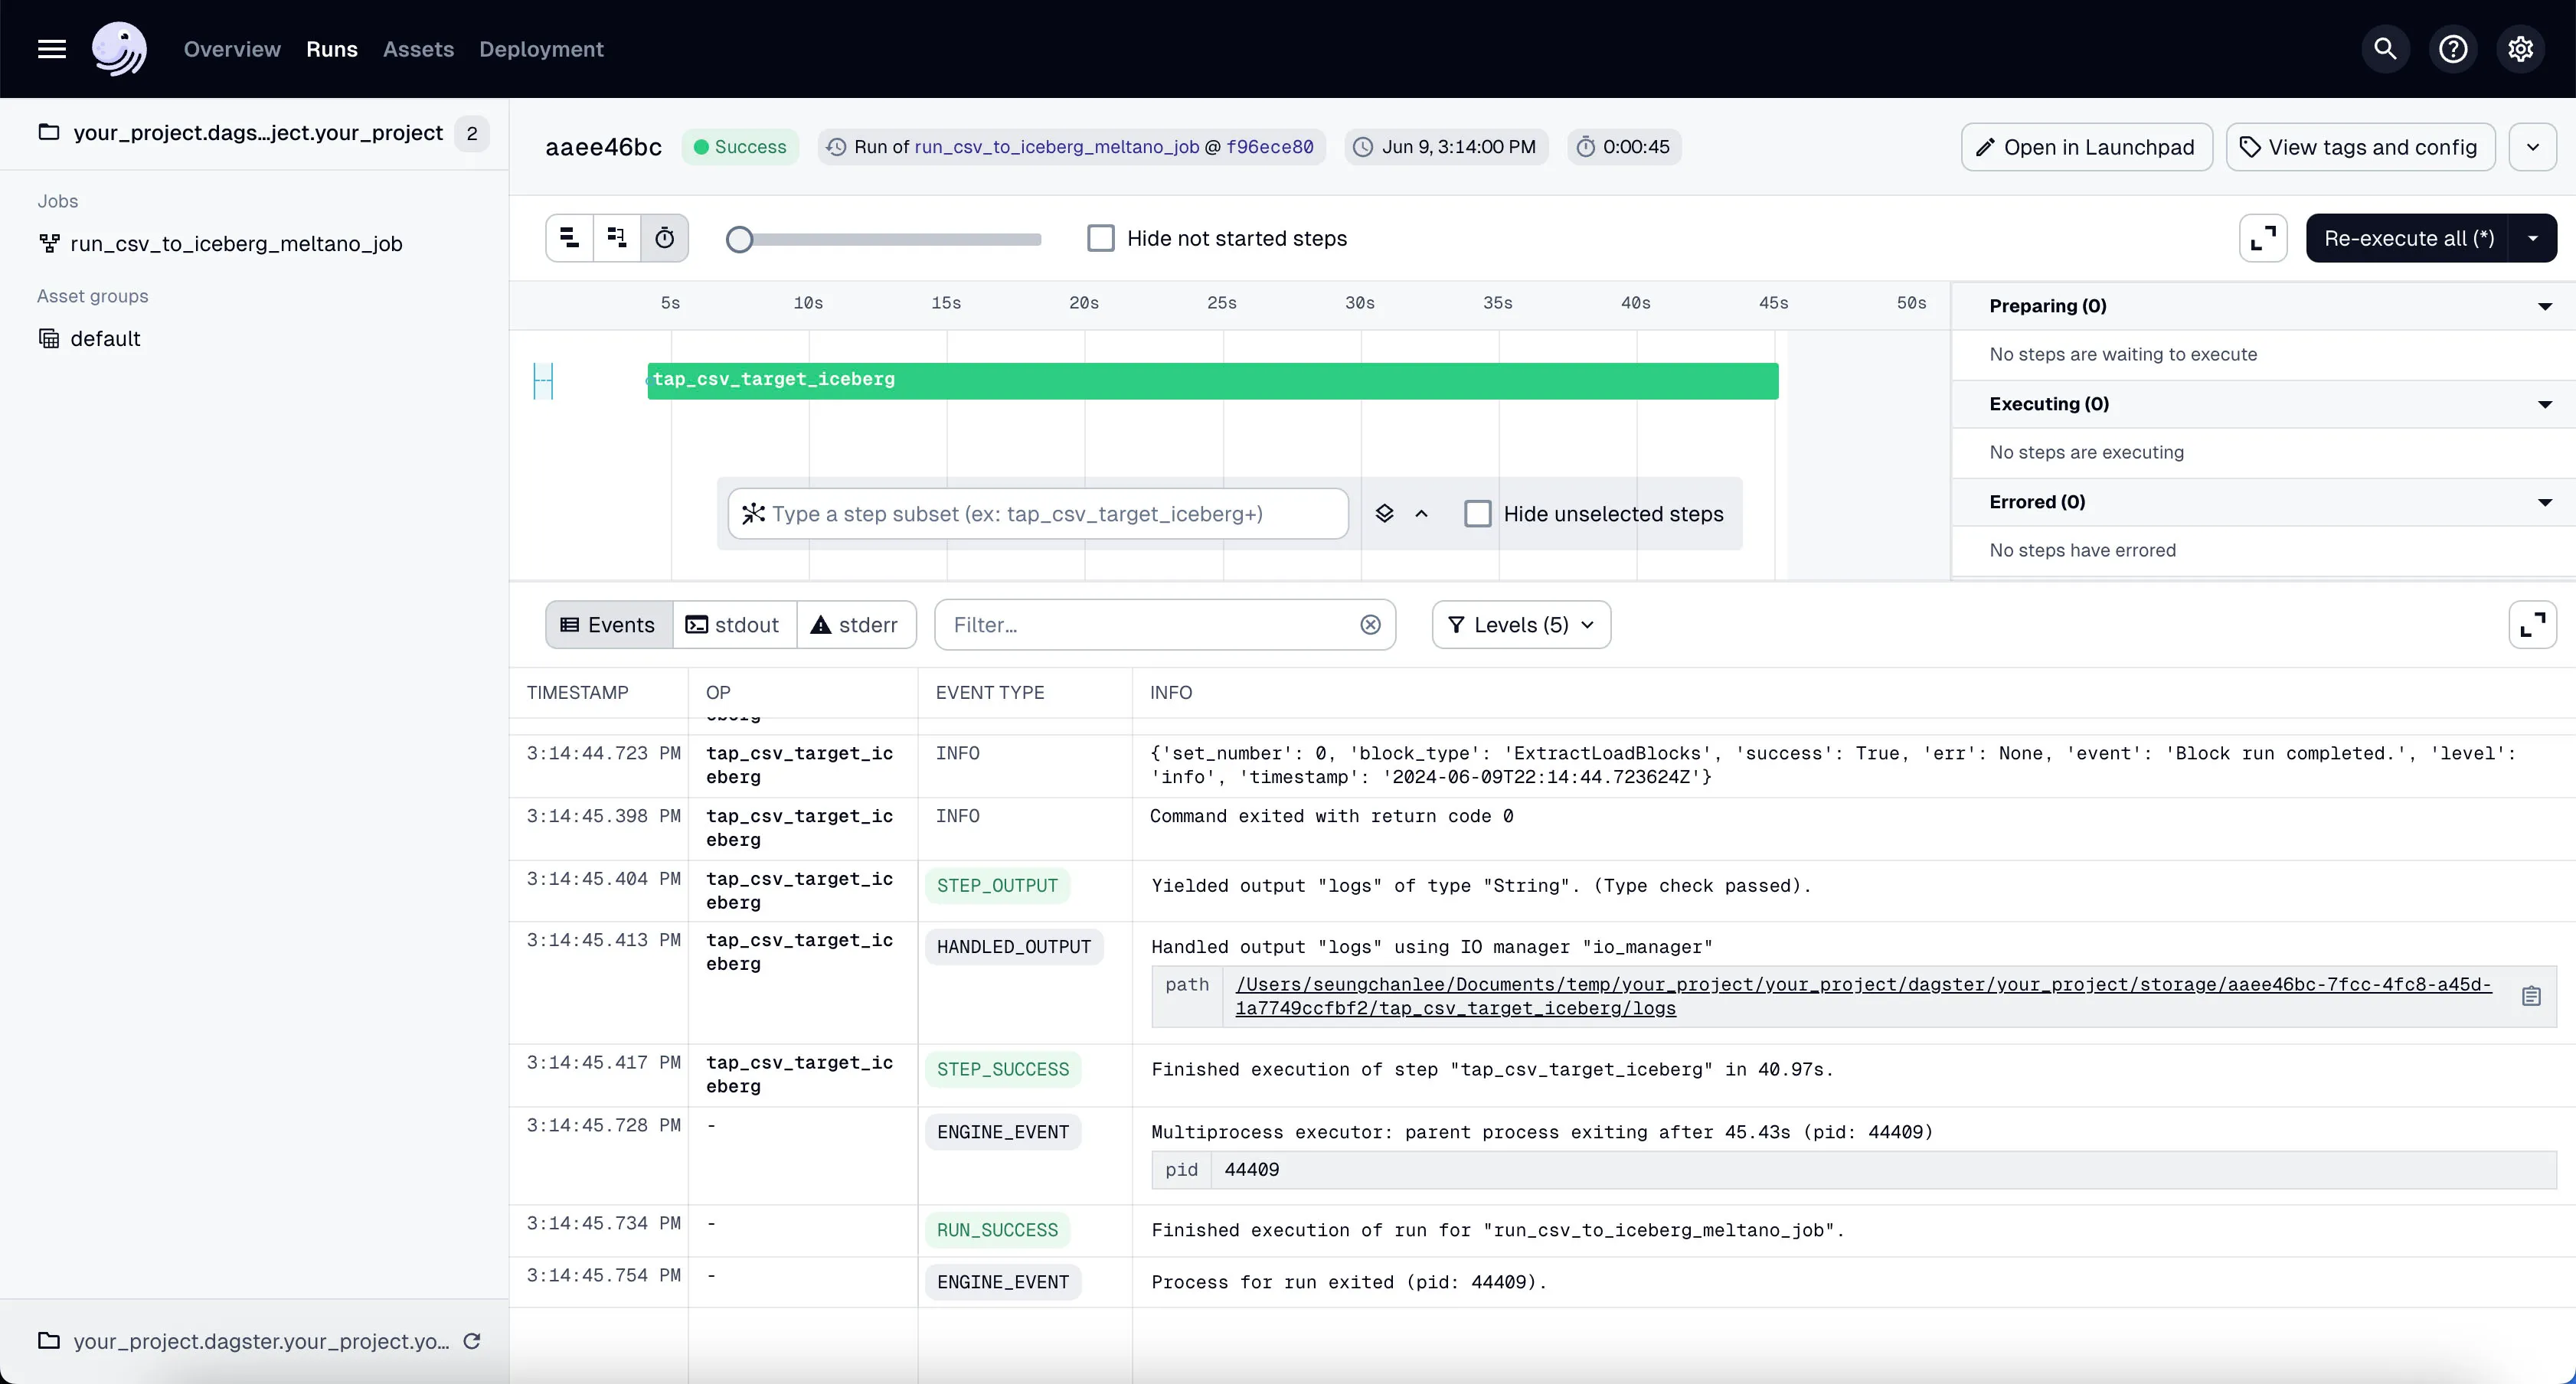
If the job is run successfully, you’ll see the 4 different tables written inside Minio’s raw directory (i.e. prefix).
Check it out in Minio by going to http://localhost:9000 and logging in with the username admin and password admin_secret.
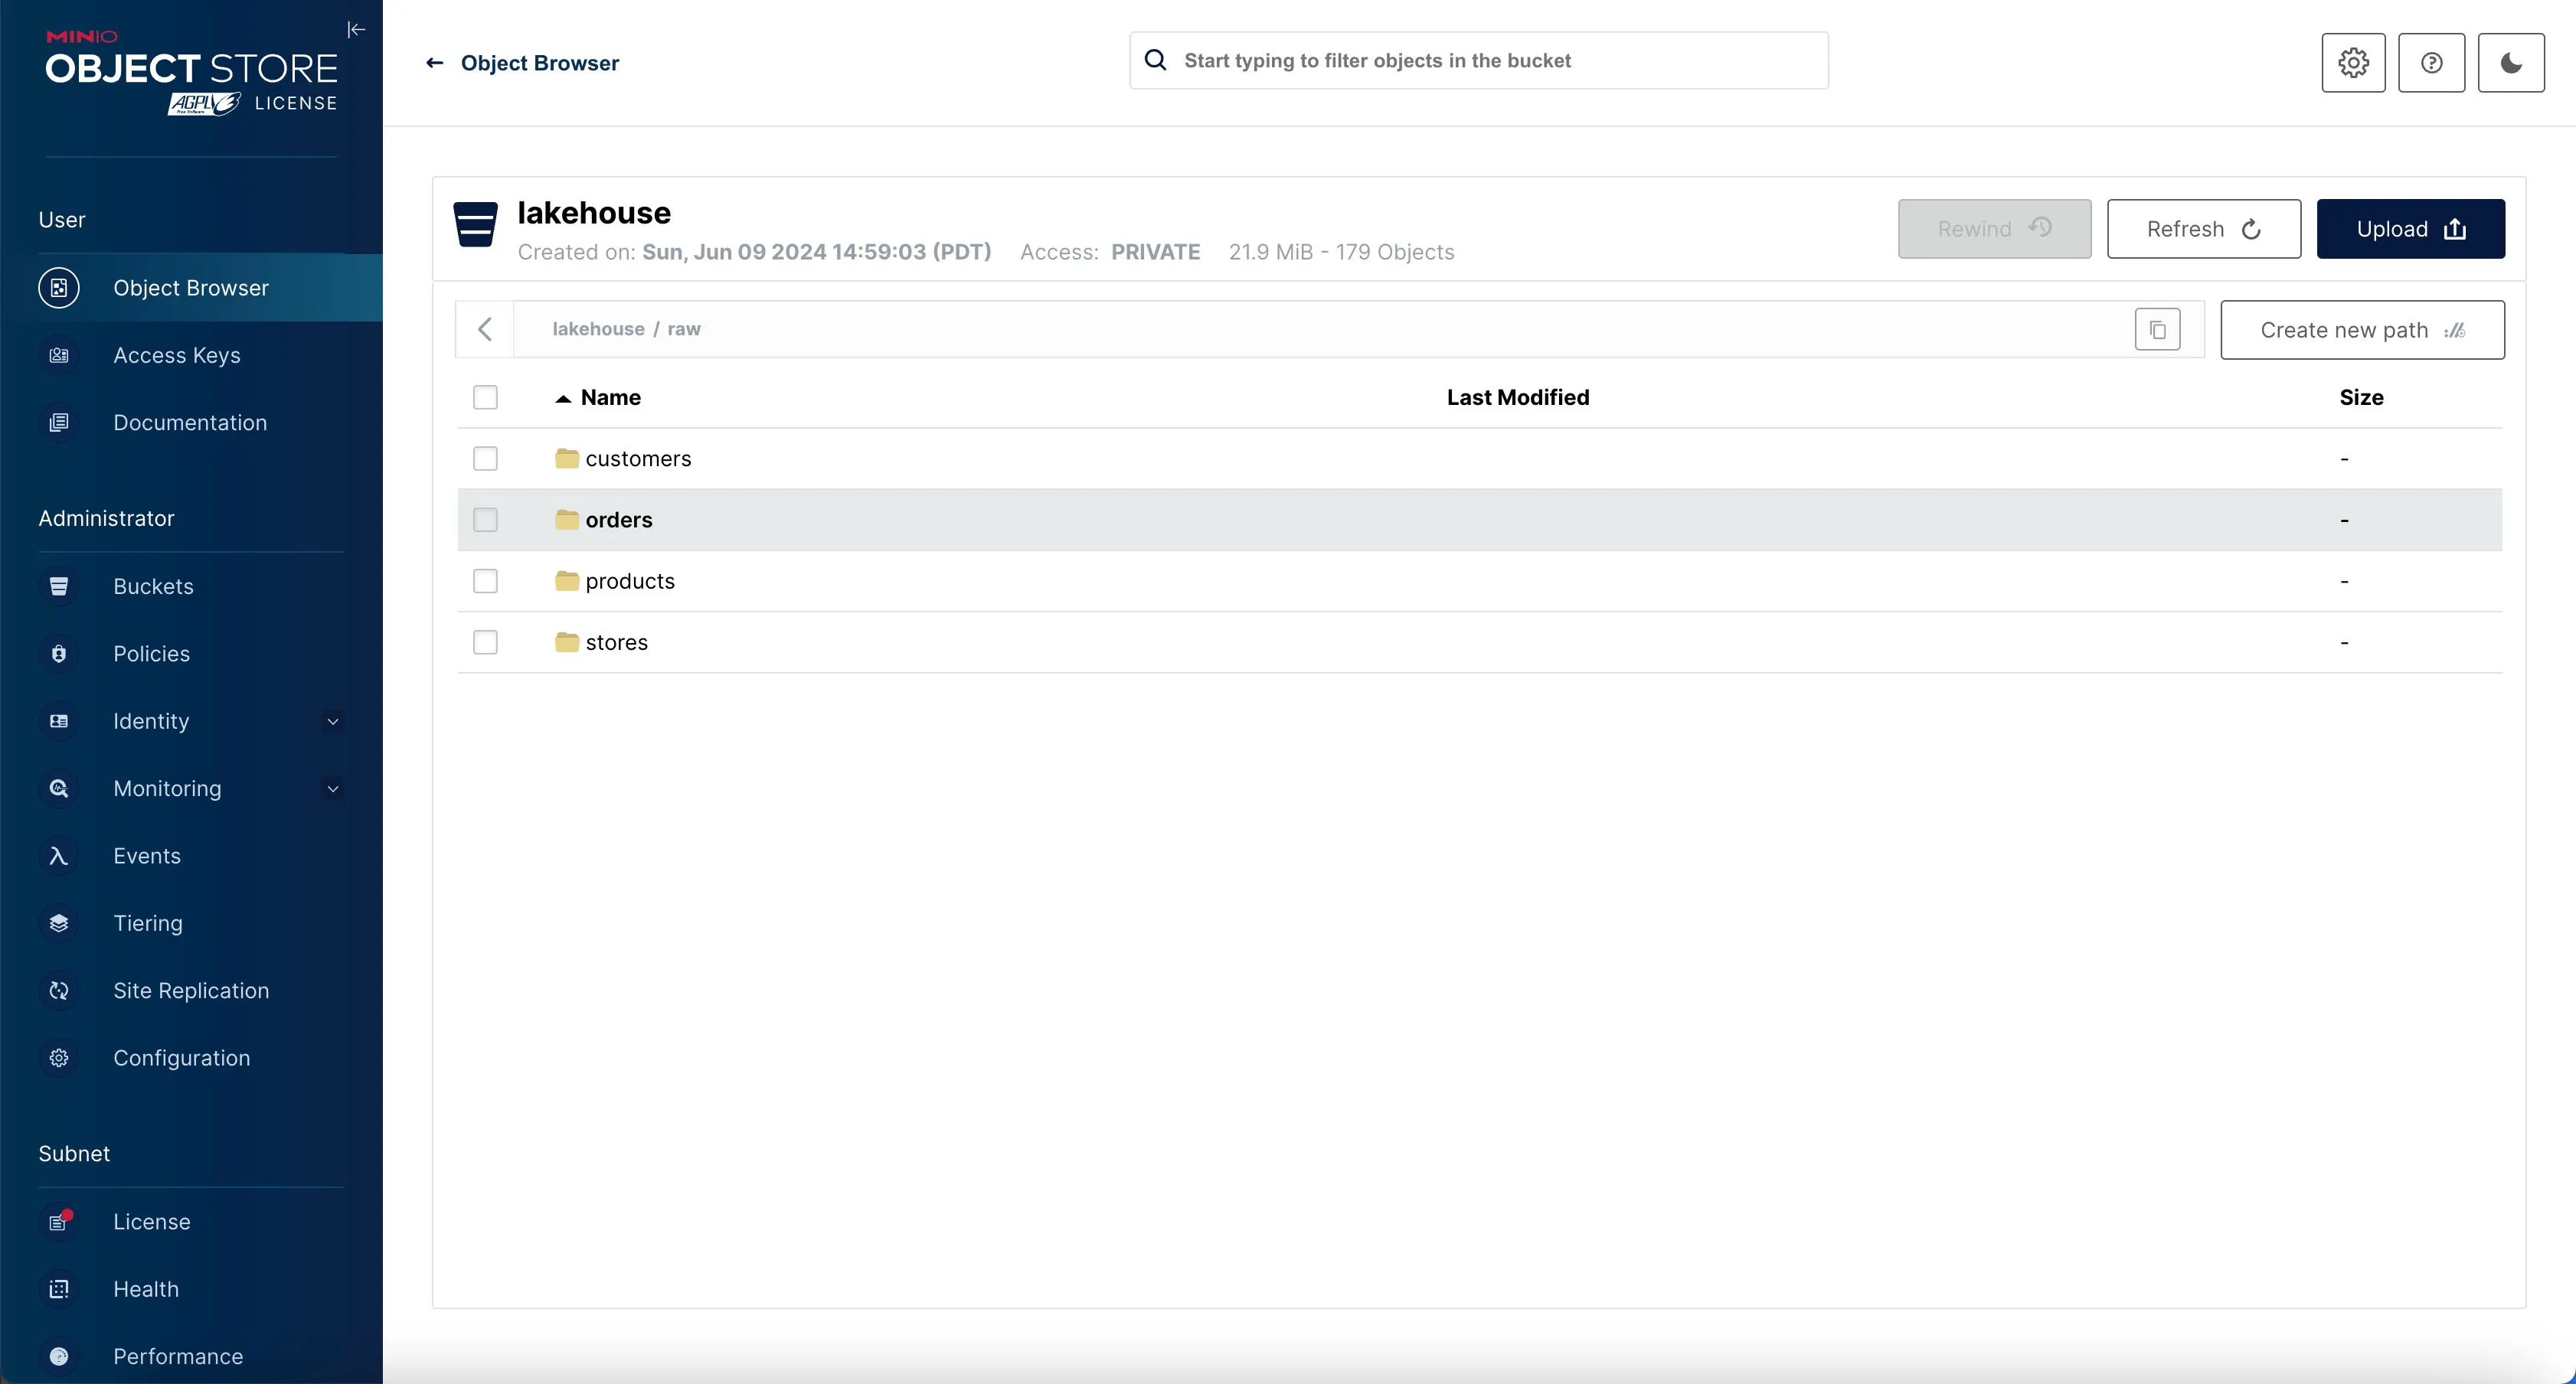
You should be able to see the raw data files in the raw directory inside the lakehouse bucket.
Inspect the Iceberg Tables with Trino
We can see that there’s data in Minio, but we can’t actually query the data directly from Minio.
If we want to inspect the actual rows, we can use our query engine Trino.
Let’s enter the Trino shell.
Once you’re in the Trino shell, first you need to switch to the iceberg catalog and raw schema. This basically tells Trino we’re using the raw schema inside the Iceberg data store.
Then list out the tables in that schema.
     Table
---------------
 orders
 customers
 products
 stores
(4 rows)
To view the data inside the table, you can run something like:
This will show you the number of rows in the orders table.
  _col0
--------
 100000
(1 row)
Looks like our data made it in just fine!
Step 3: Run the DBT Transformations in Dagster
Now that we have the data in the Iceberg tables, we can run transformation on them to turn them into analytics-ready tables.
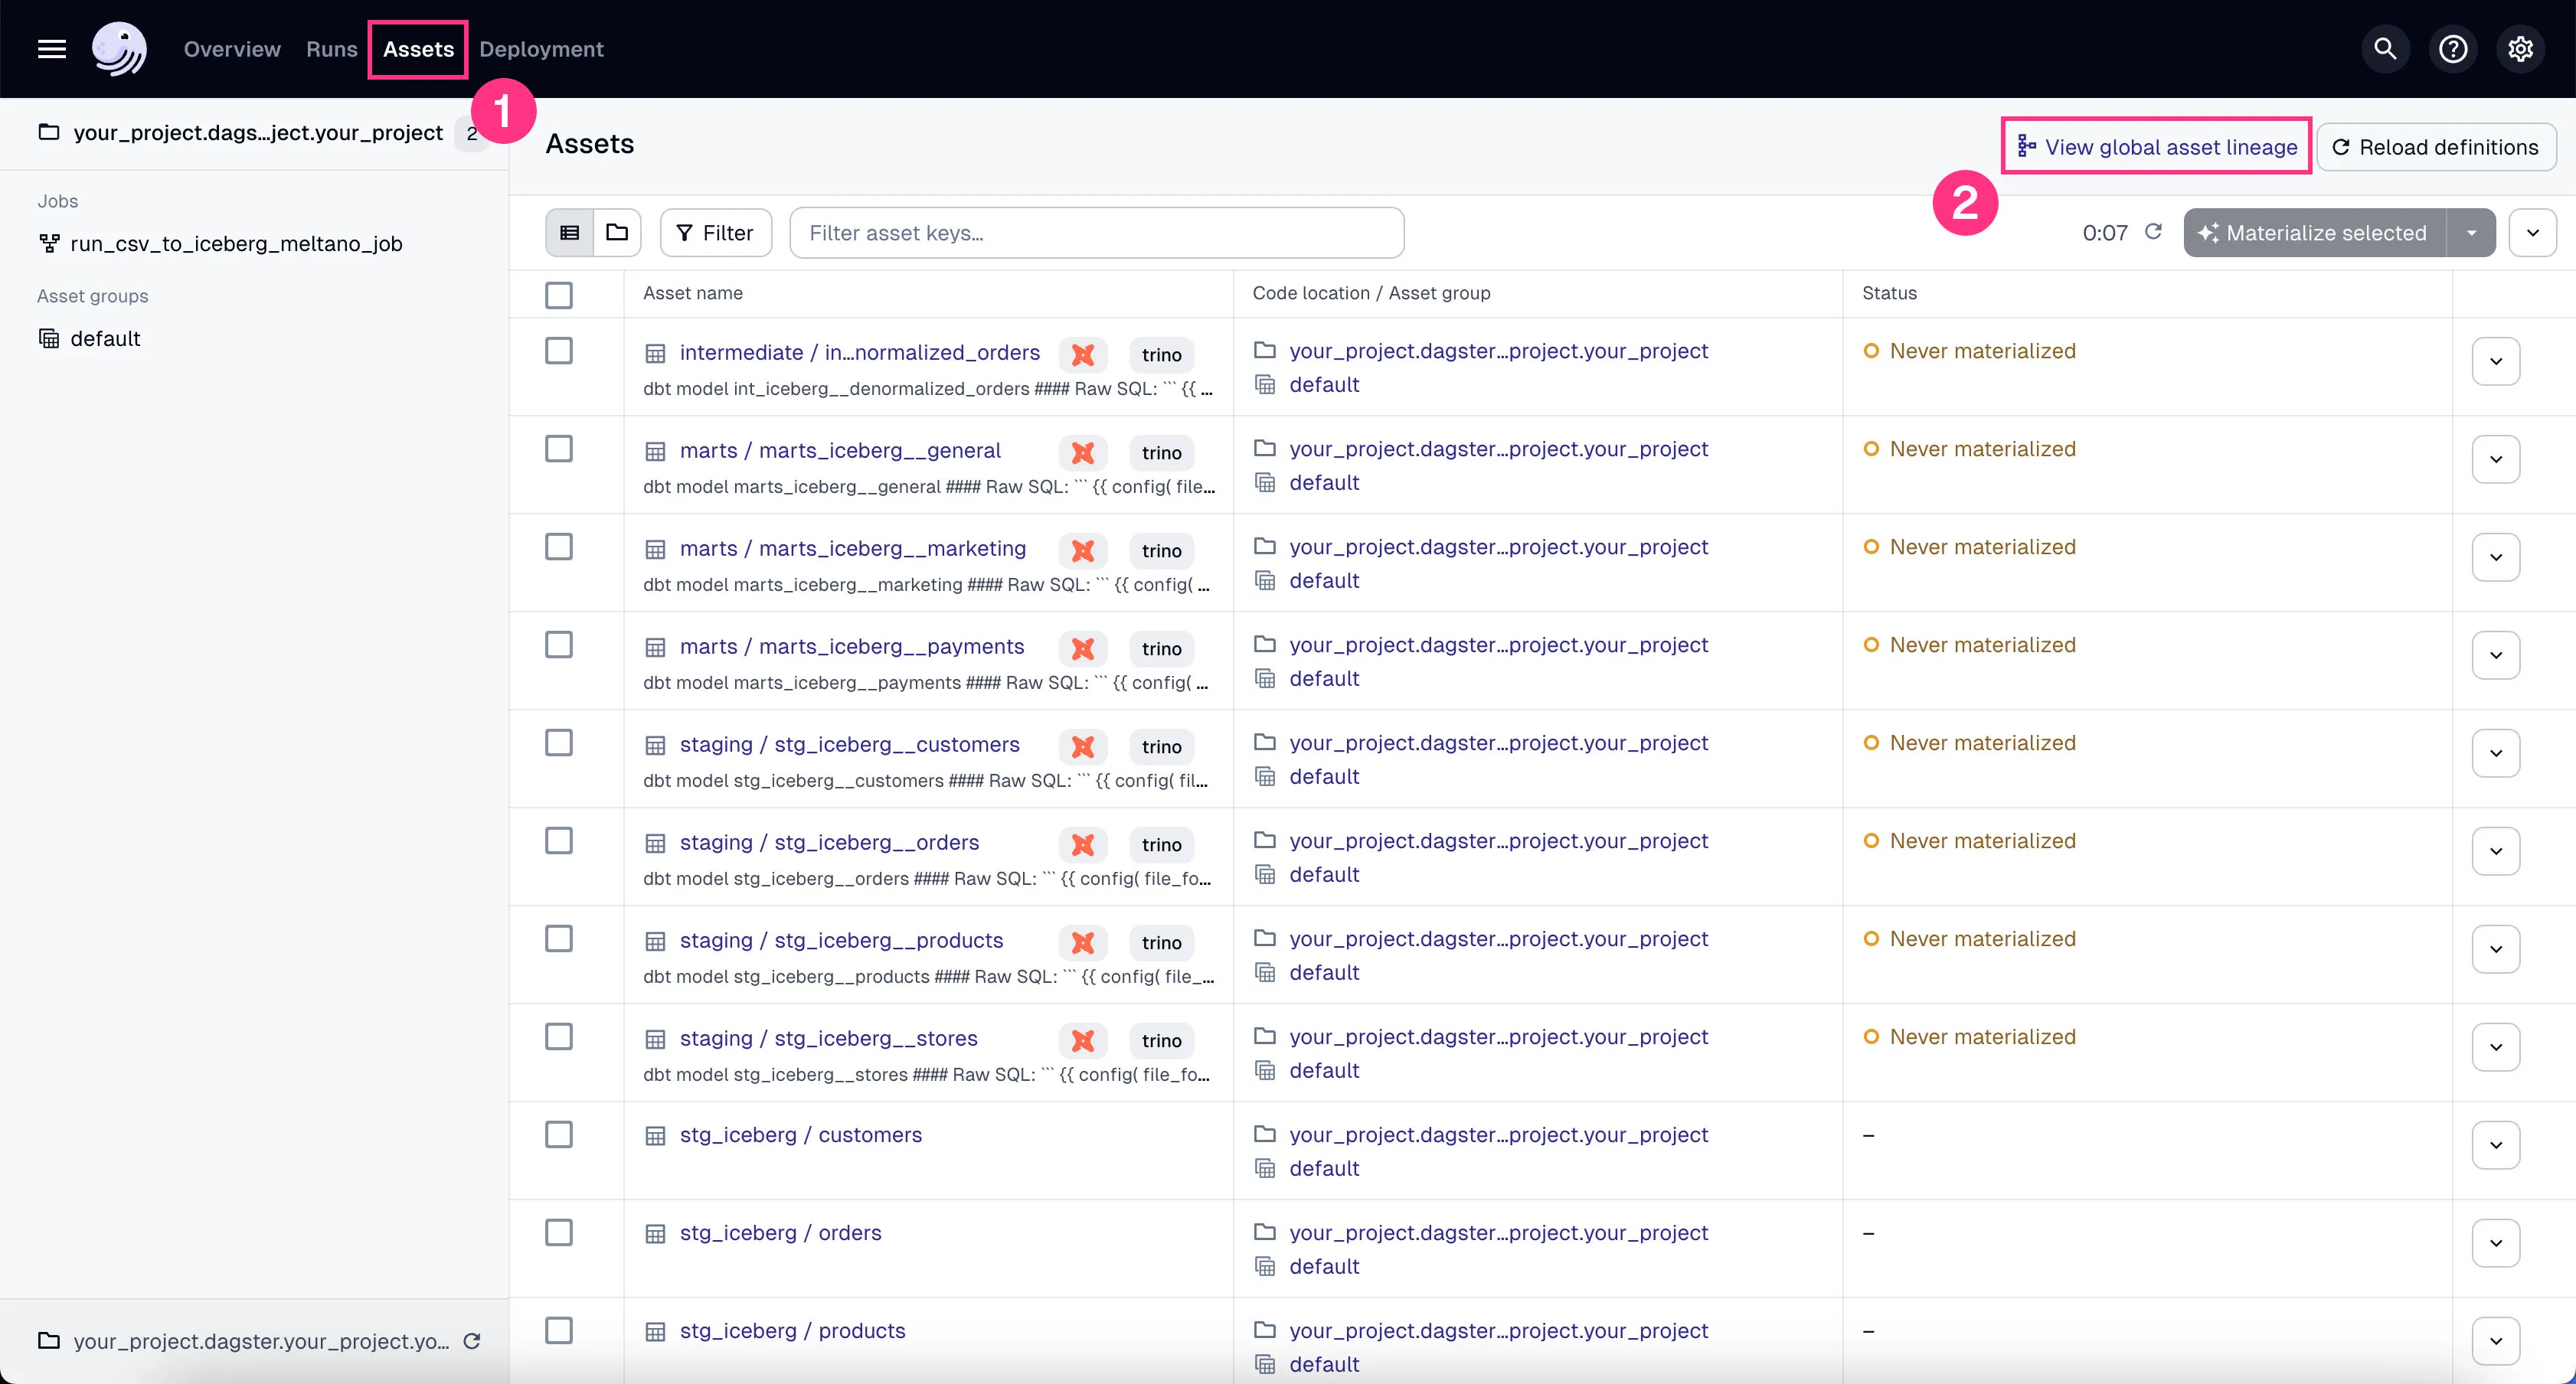
You can see all the DBT assets in Global Asset Lineage section of the Dagster dashboard:
-
Click on the “Assets” in the top menu.
-
Click on “View global asset lineage” at the top right.
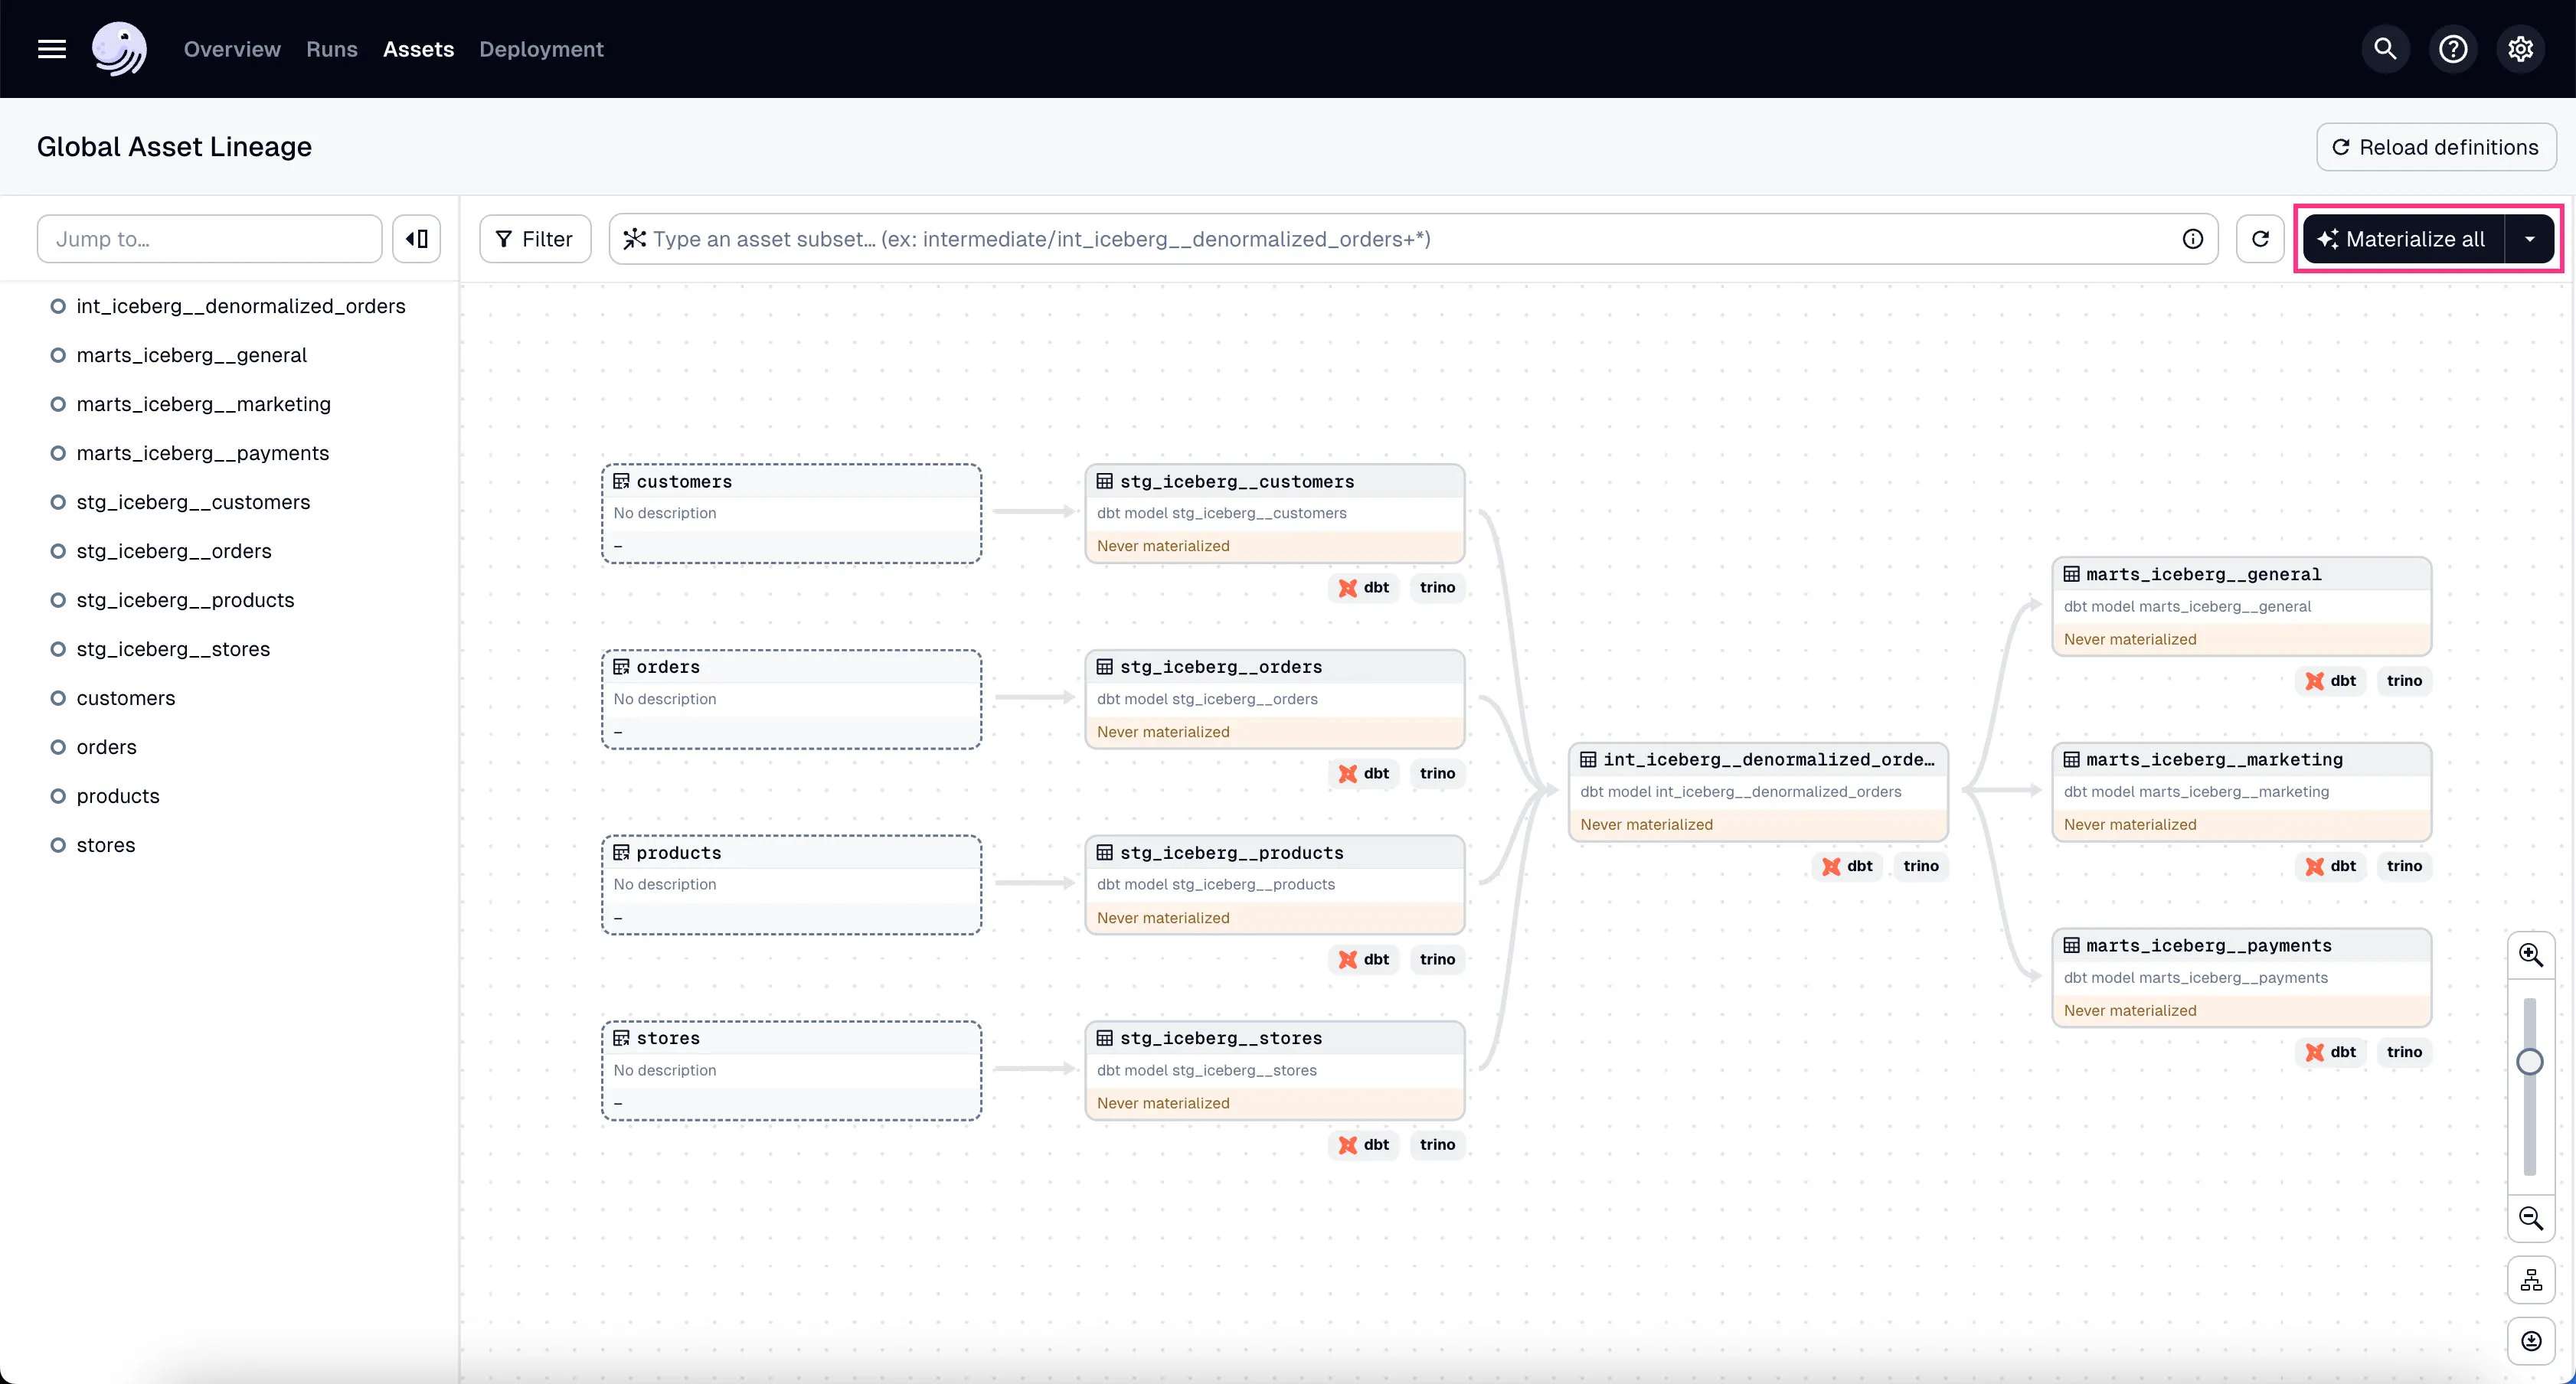
In the global asset lineage view, click “Materialize all” to execute the DBT transformations (underneath, Trino is executing these DBT queries). Of course, in a production environment, you might want to schedule them instead of manually triggering them as we’re doing now.
If the materialization was successful, you should see 3 analytics-ready tables in project_marts directory (i.e. prefix) in minio.
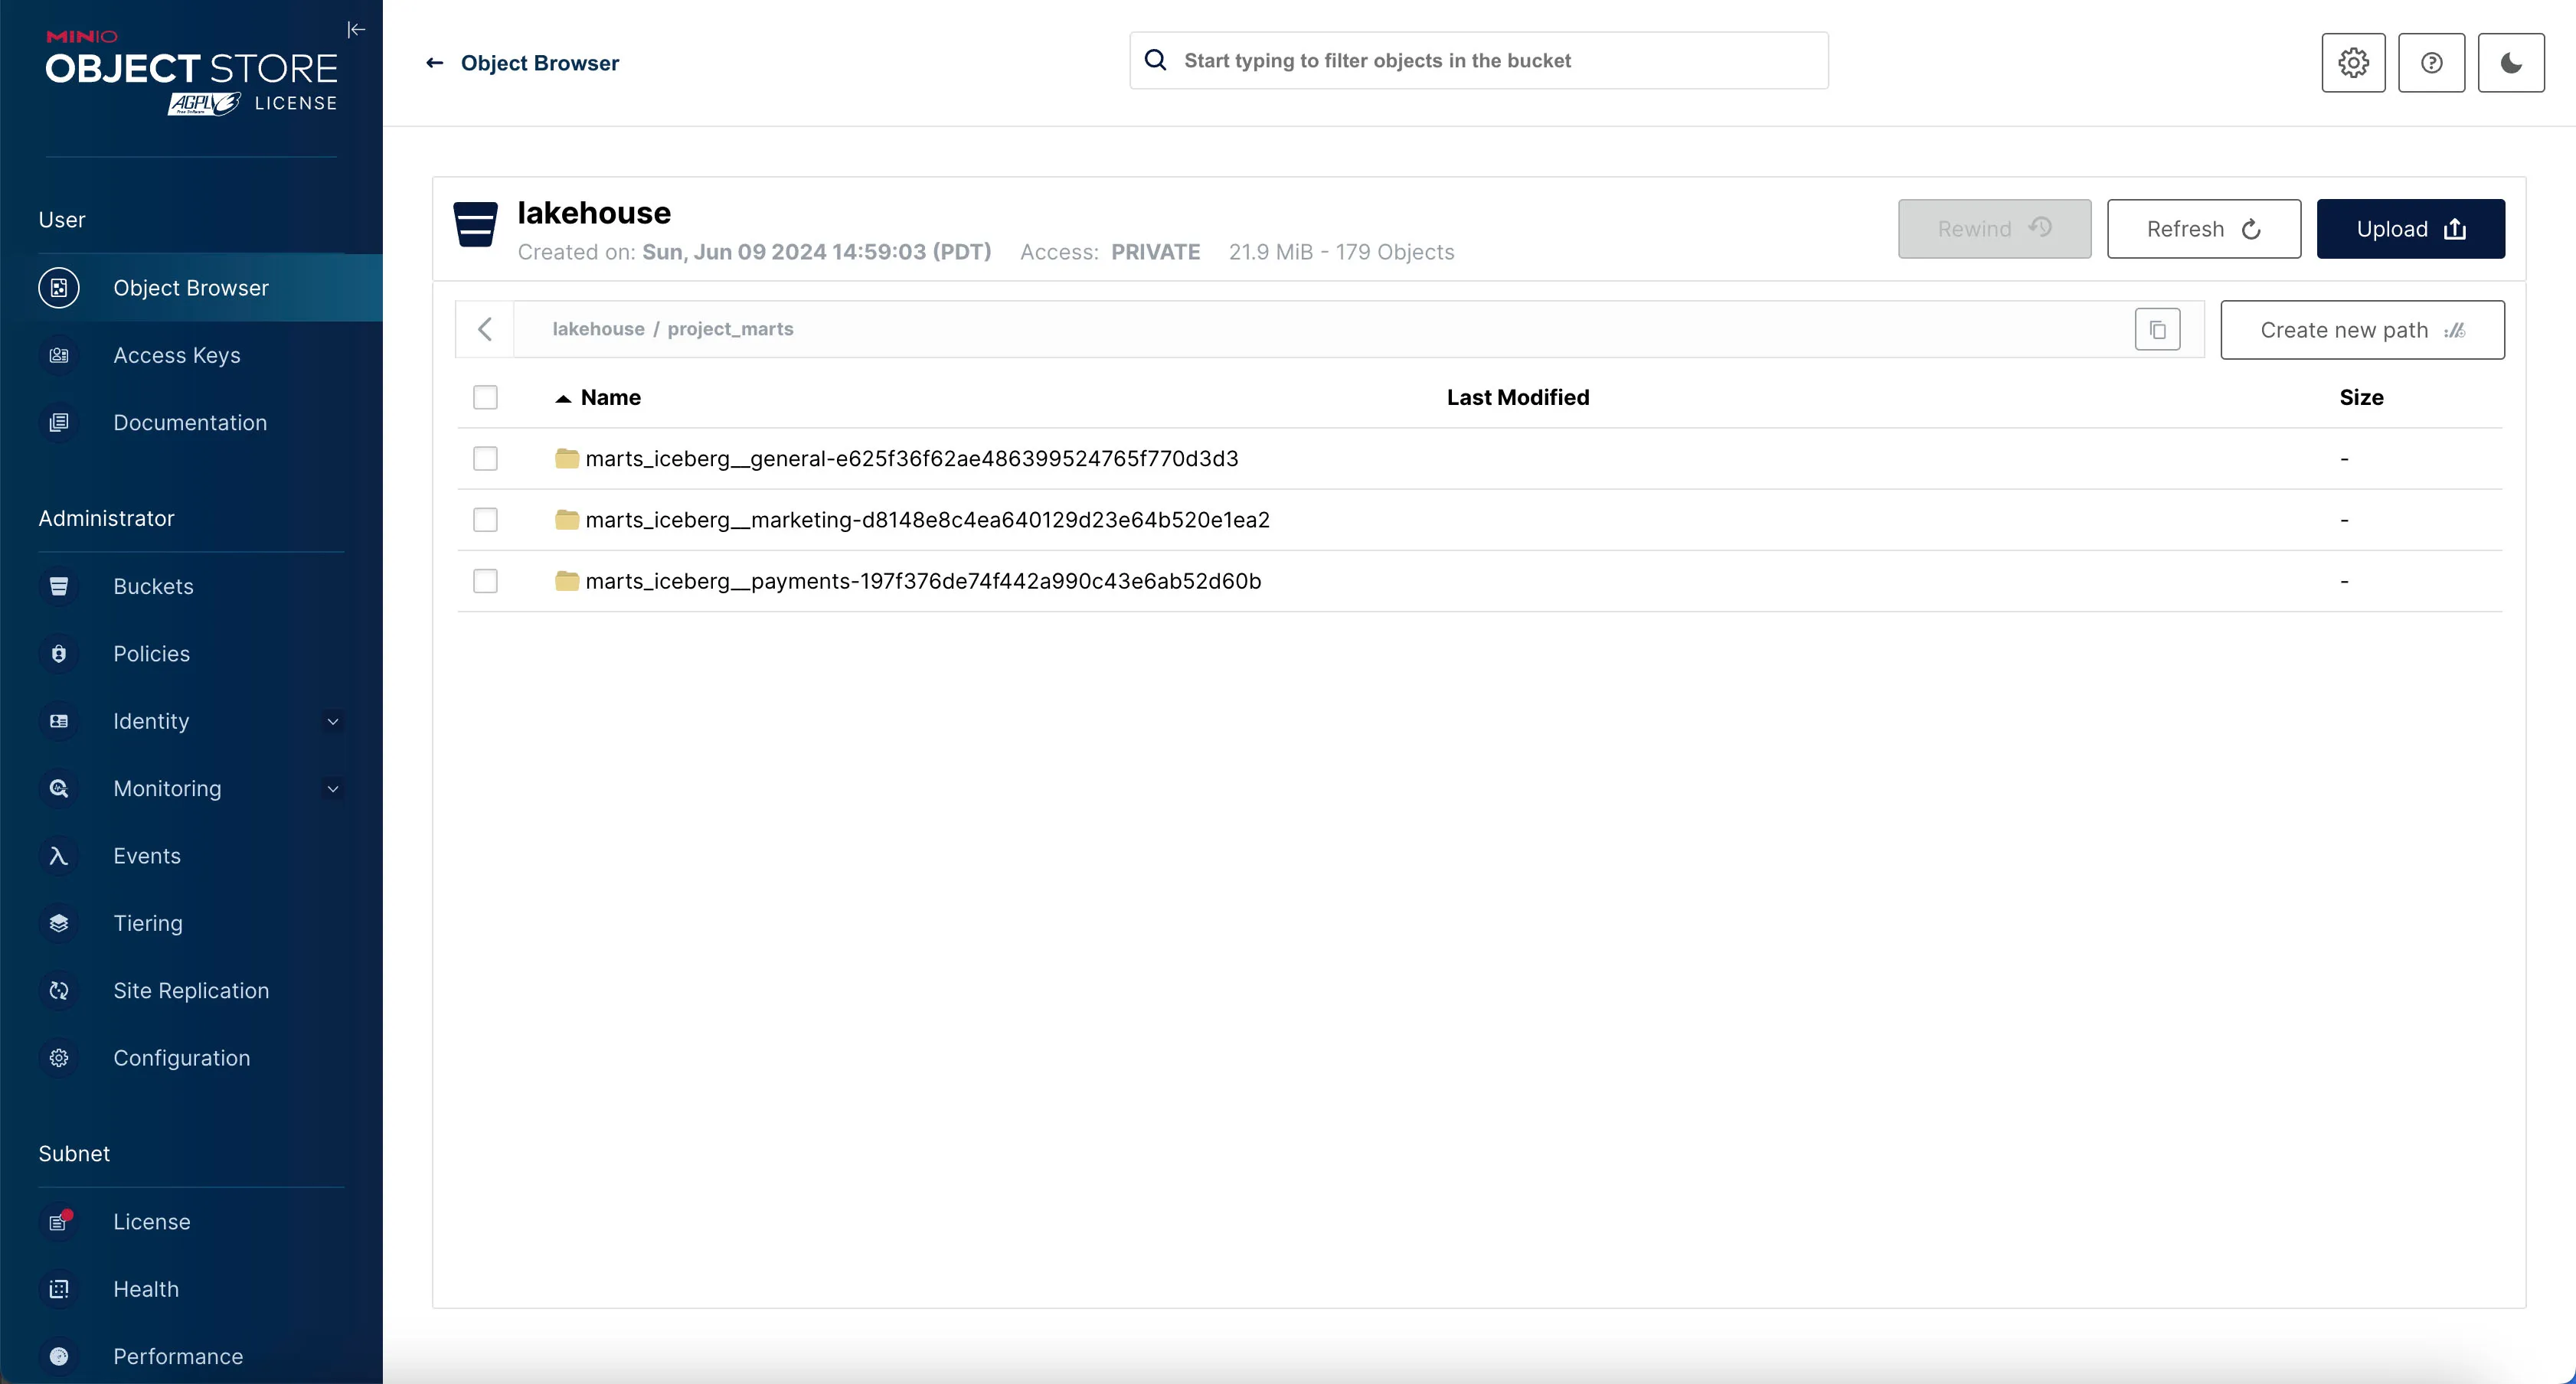
Nice - the data is now transformed and ready for analytics!
Step 4: Add Trino as a Database Connection in Superset and Add an Example Dashboard.
OK, now we’re ready to visualize our data. For that, we’ll use Superset.
Let’s configure Superset to connect to Trino so we can visualize the data.
Superset + Trino
Go to the Superset dashboard at http://localhost:8088 and log in with the username admin and password admin.
If you’d like, you can change the username and password in the docker-init.sh file inside the superset/docker directory:
...
ADMIN_PASSWORD="admin"
...
# Create an admin user
echo_step "2" "Starting" "Setting up admin user ( admin / $ADMIN_PASSWORD )"
superset fab create-admin \
              --username admin \
              --firstname Superset \
              --lastname Admin \
              --email admin@superset.com \
              --password $ADMIN_PASSWORD
Add Trino as a Database Connection in Superset
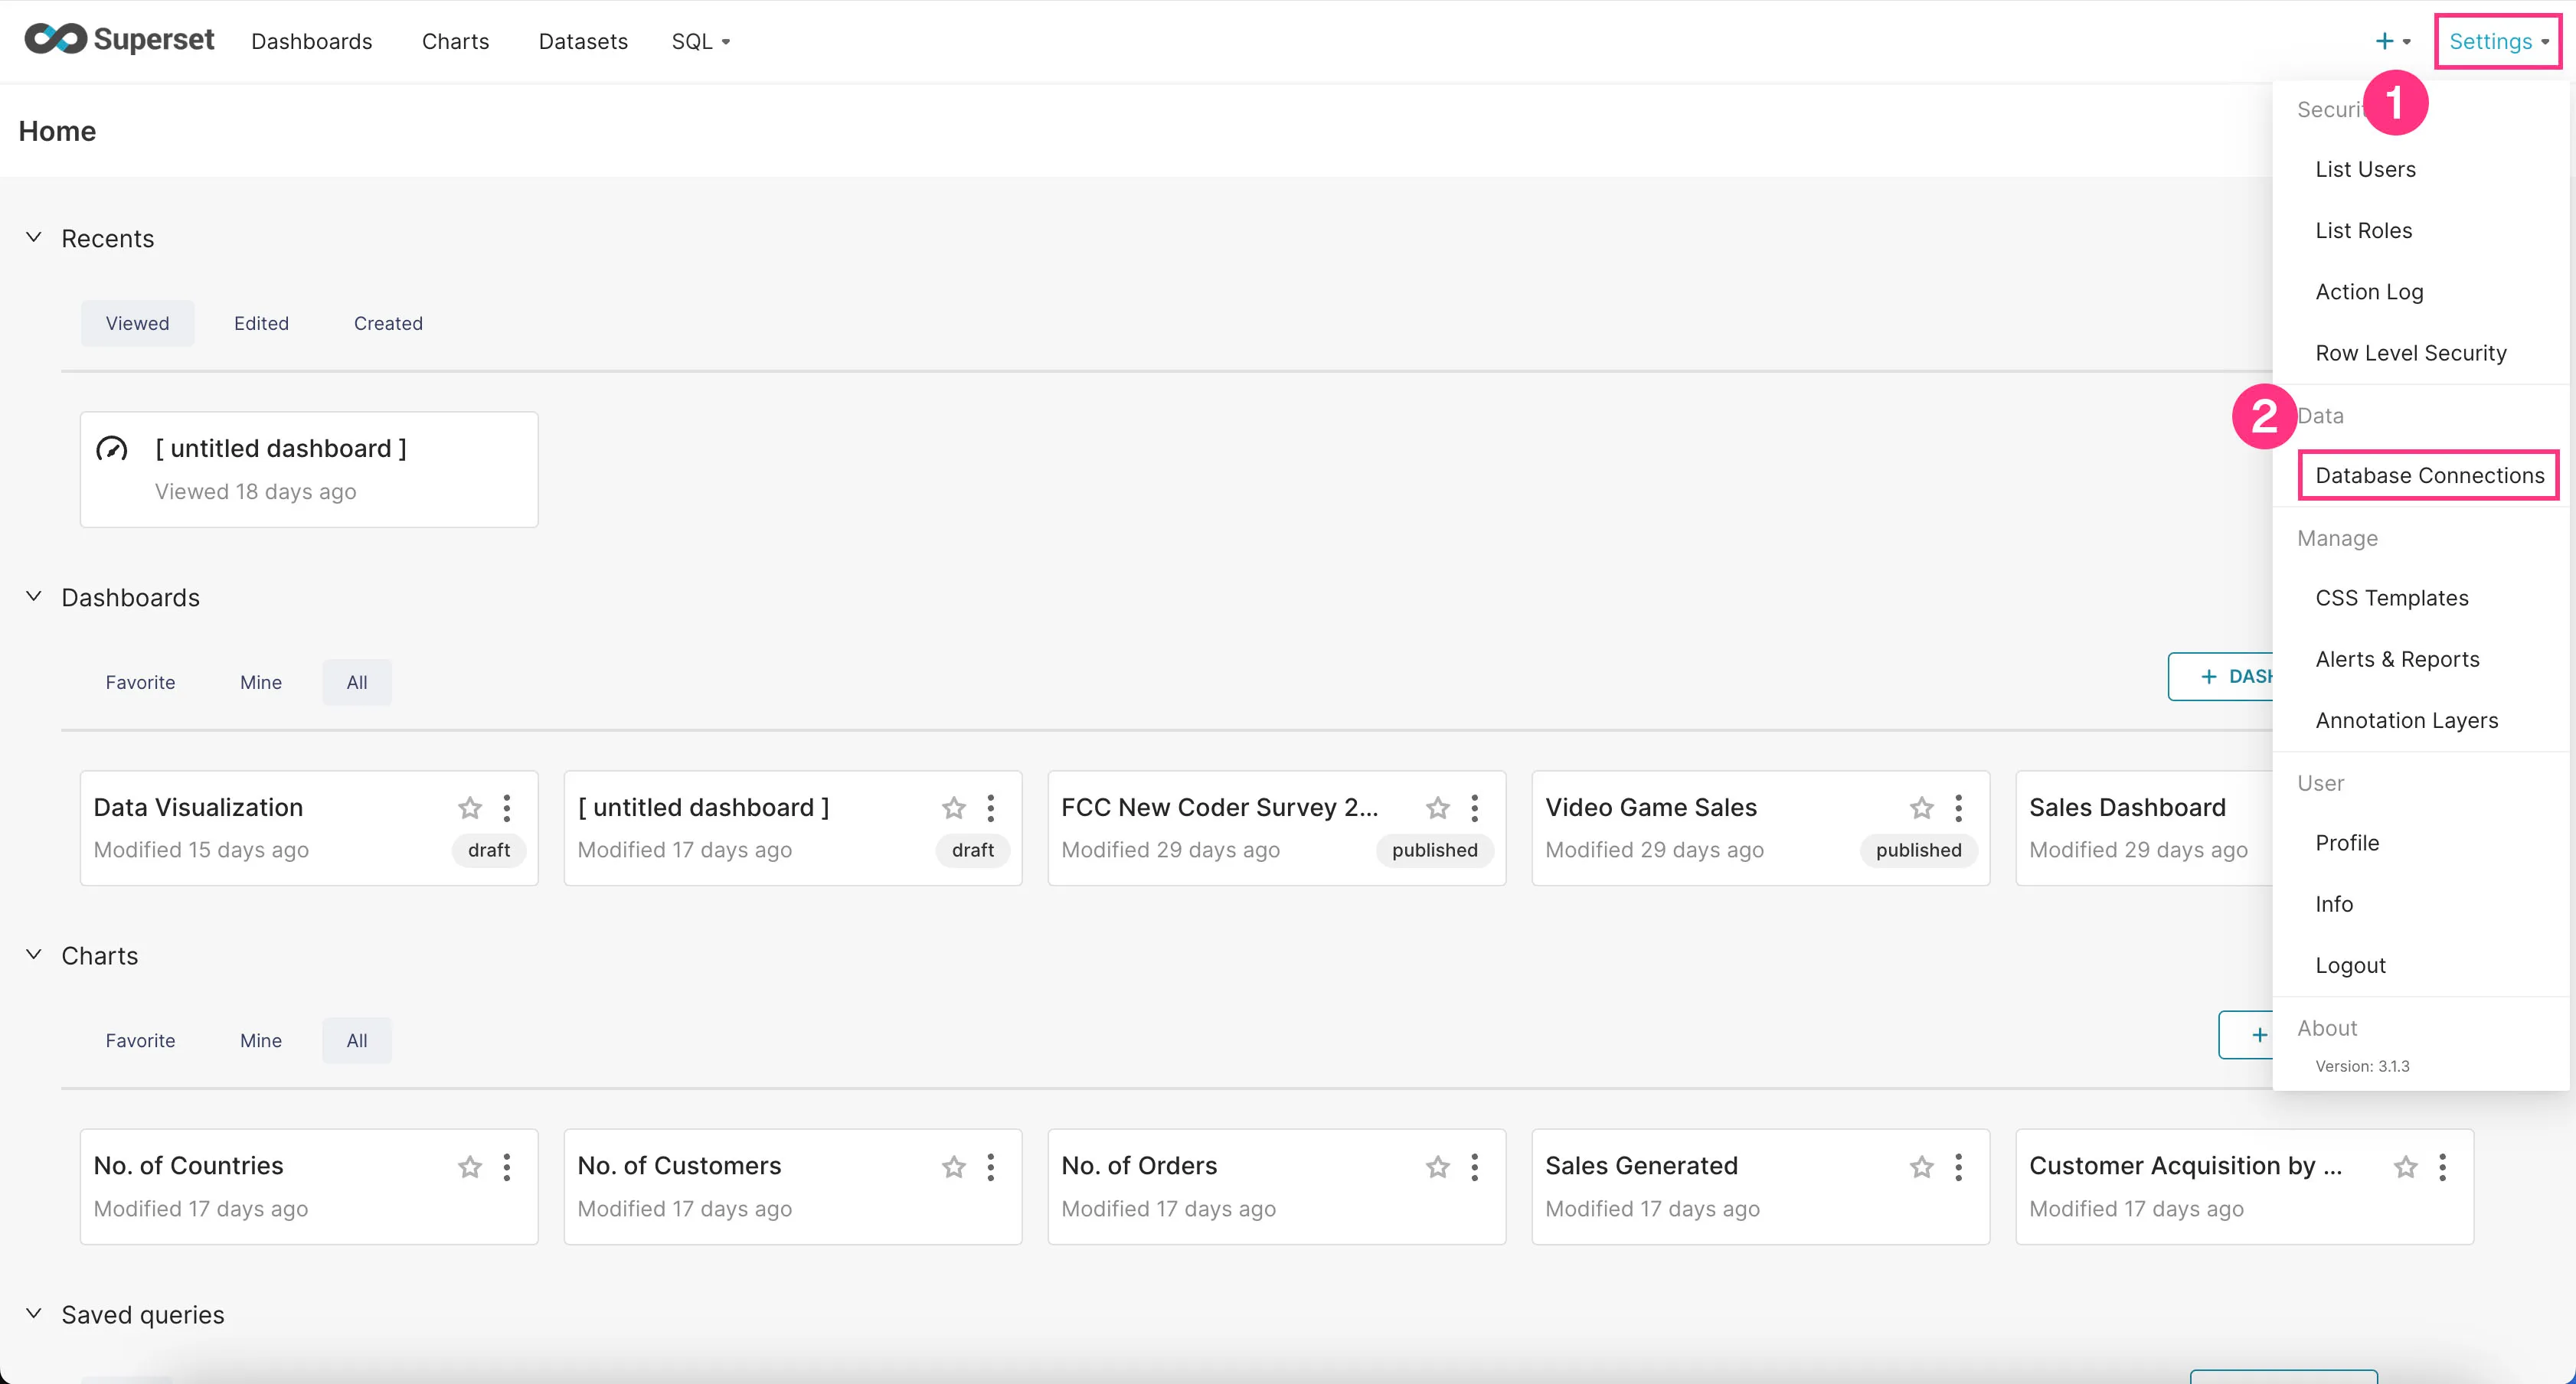
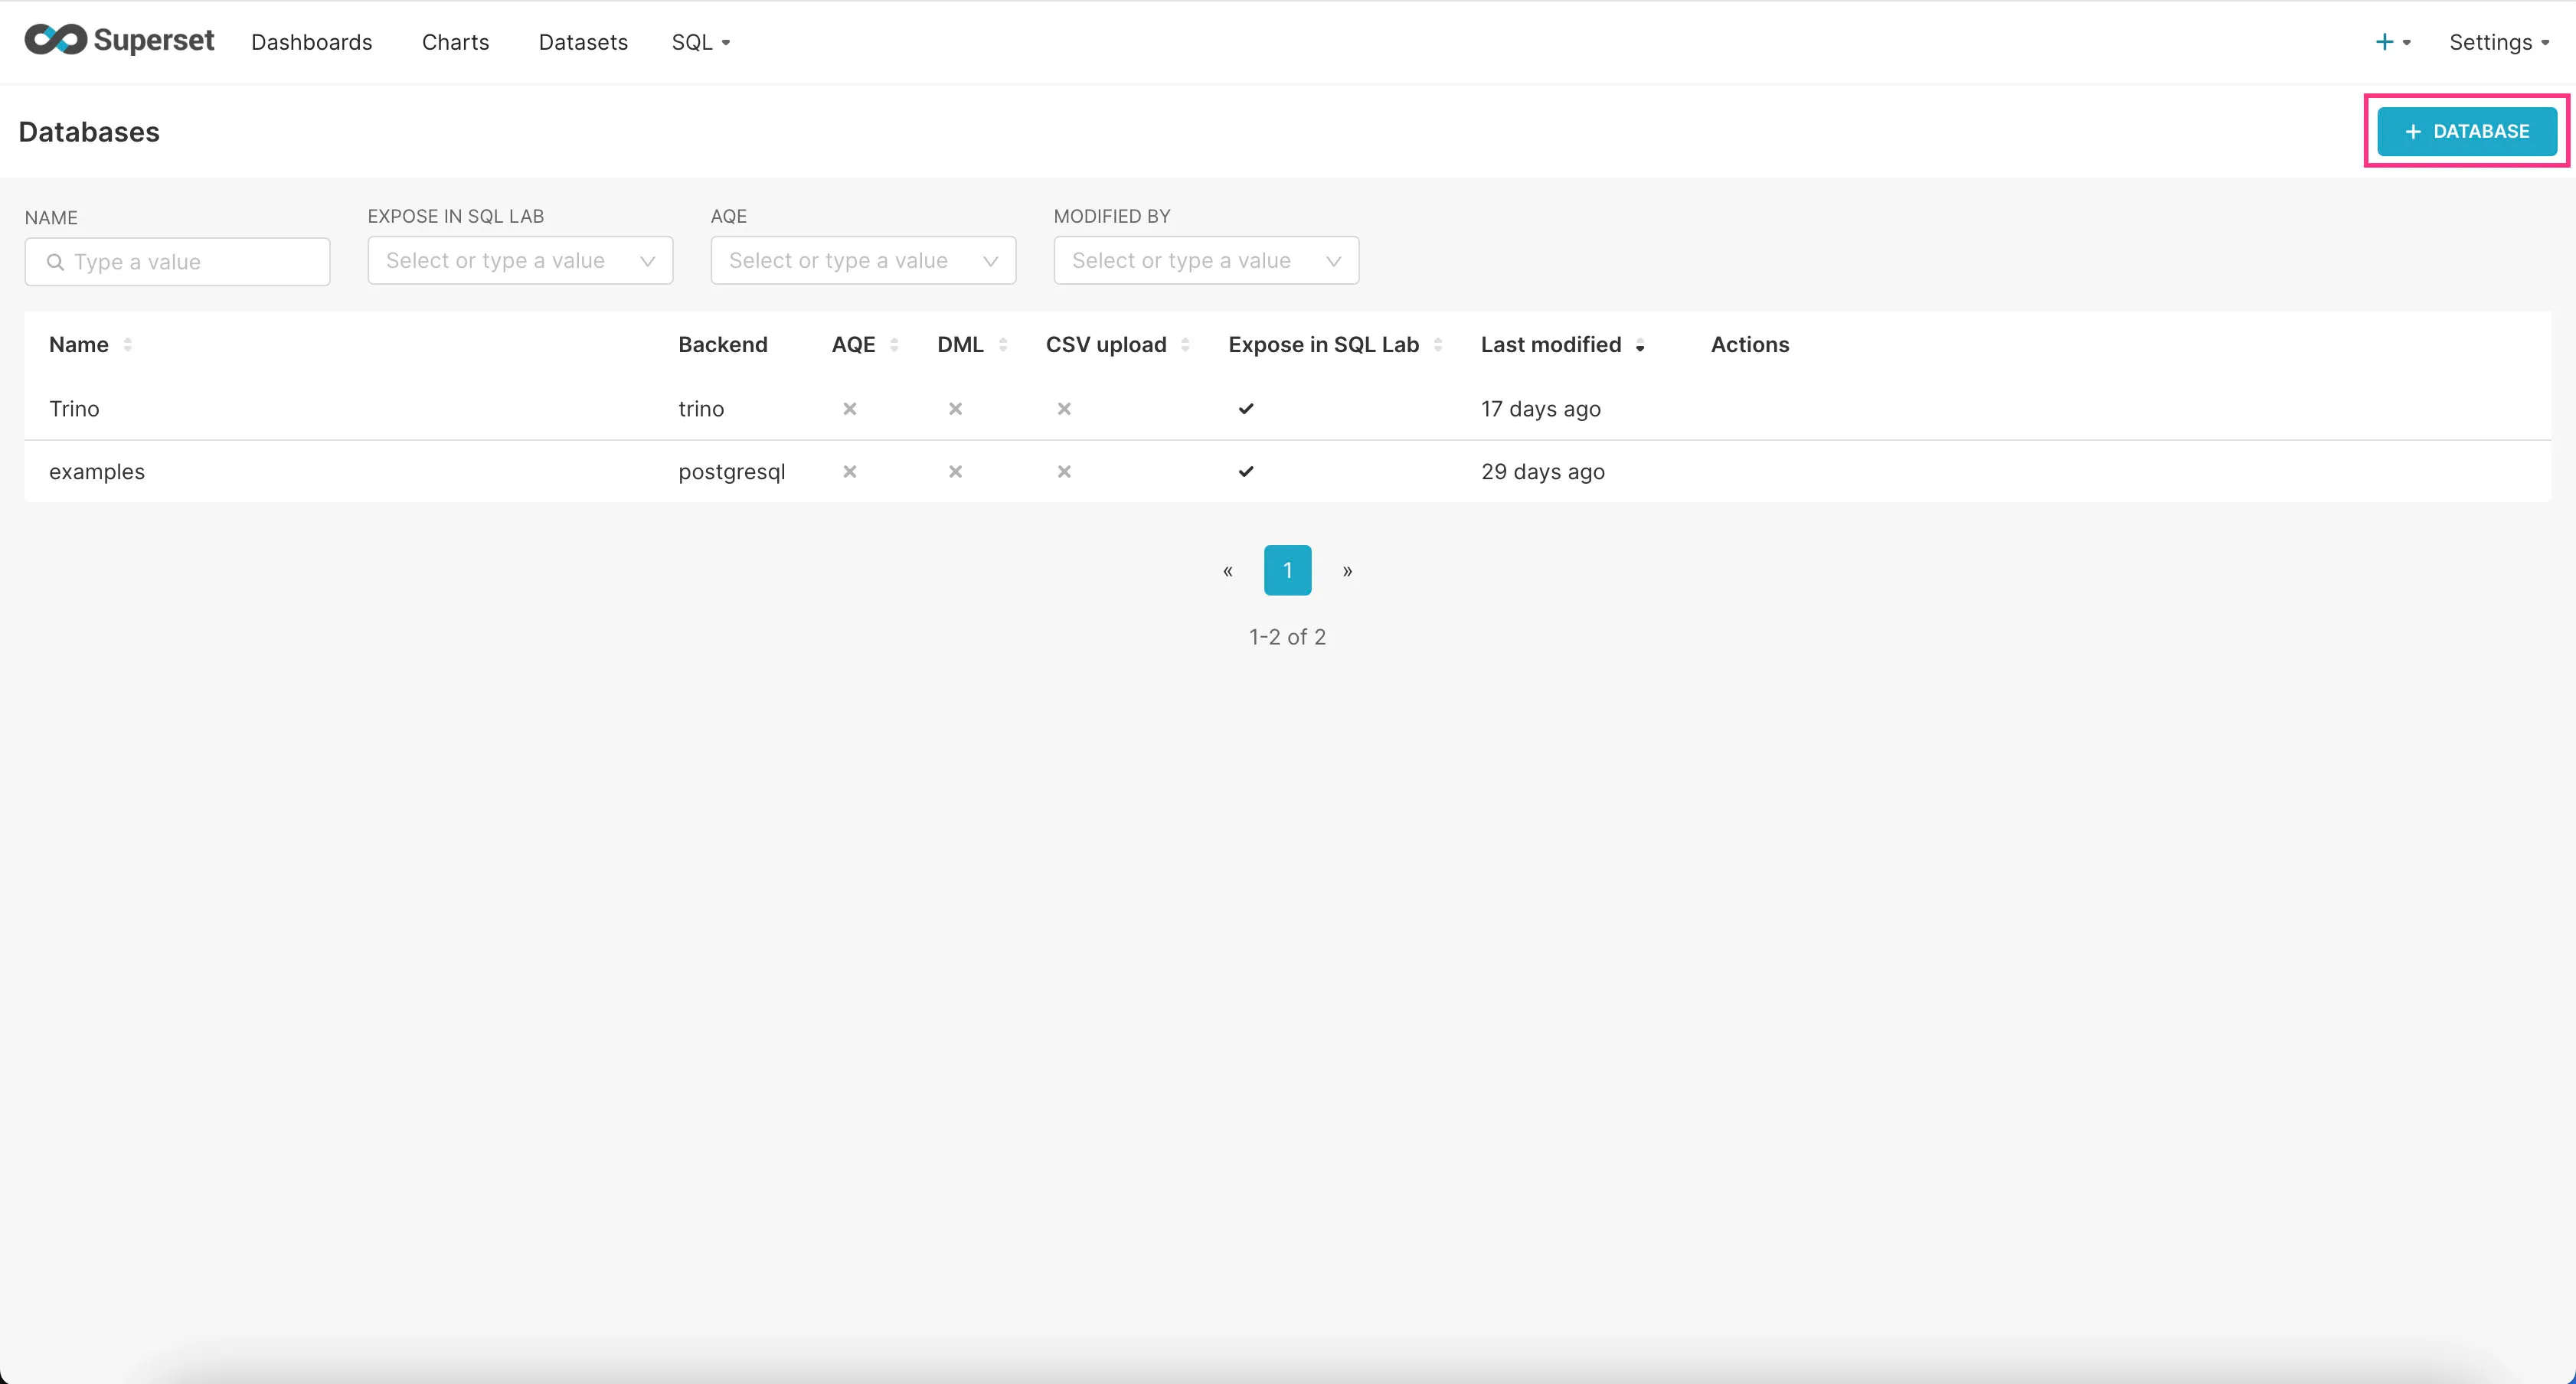
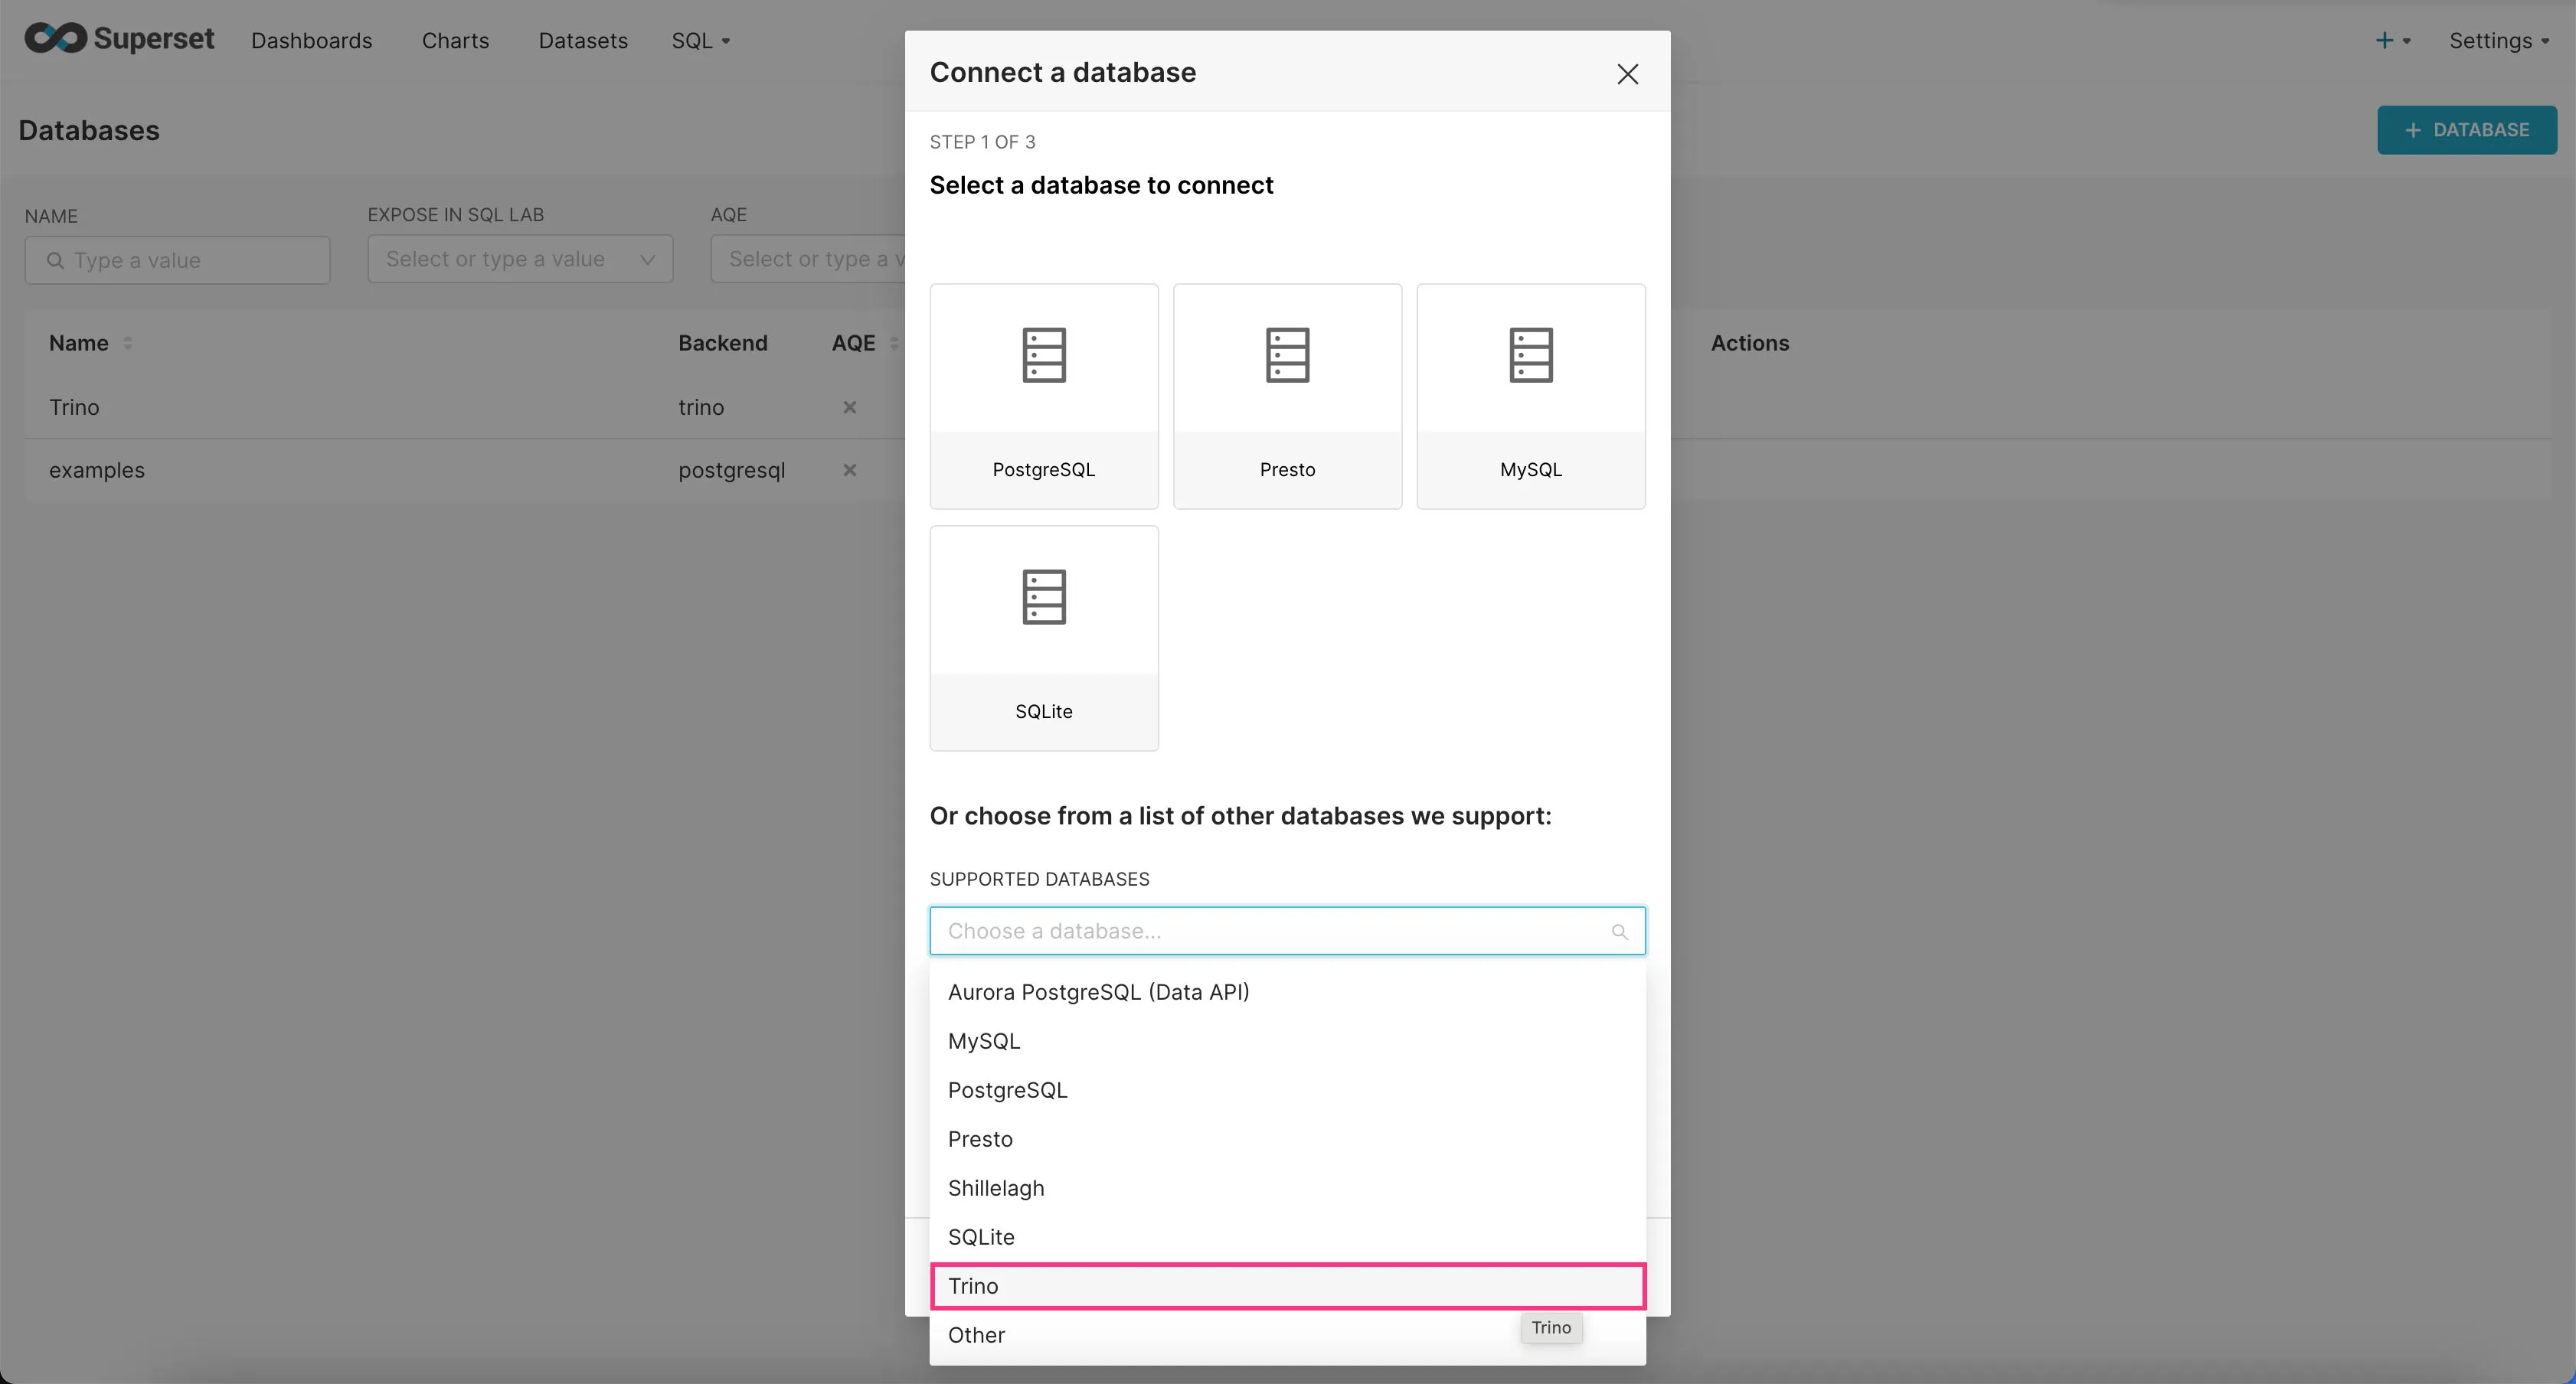
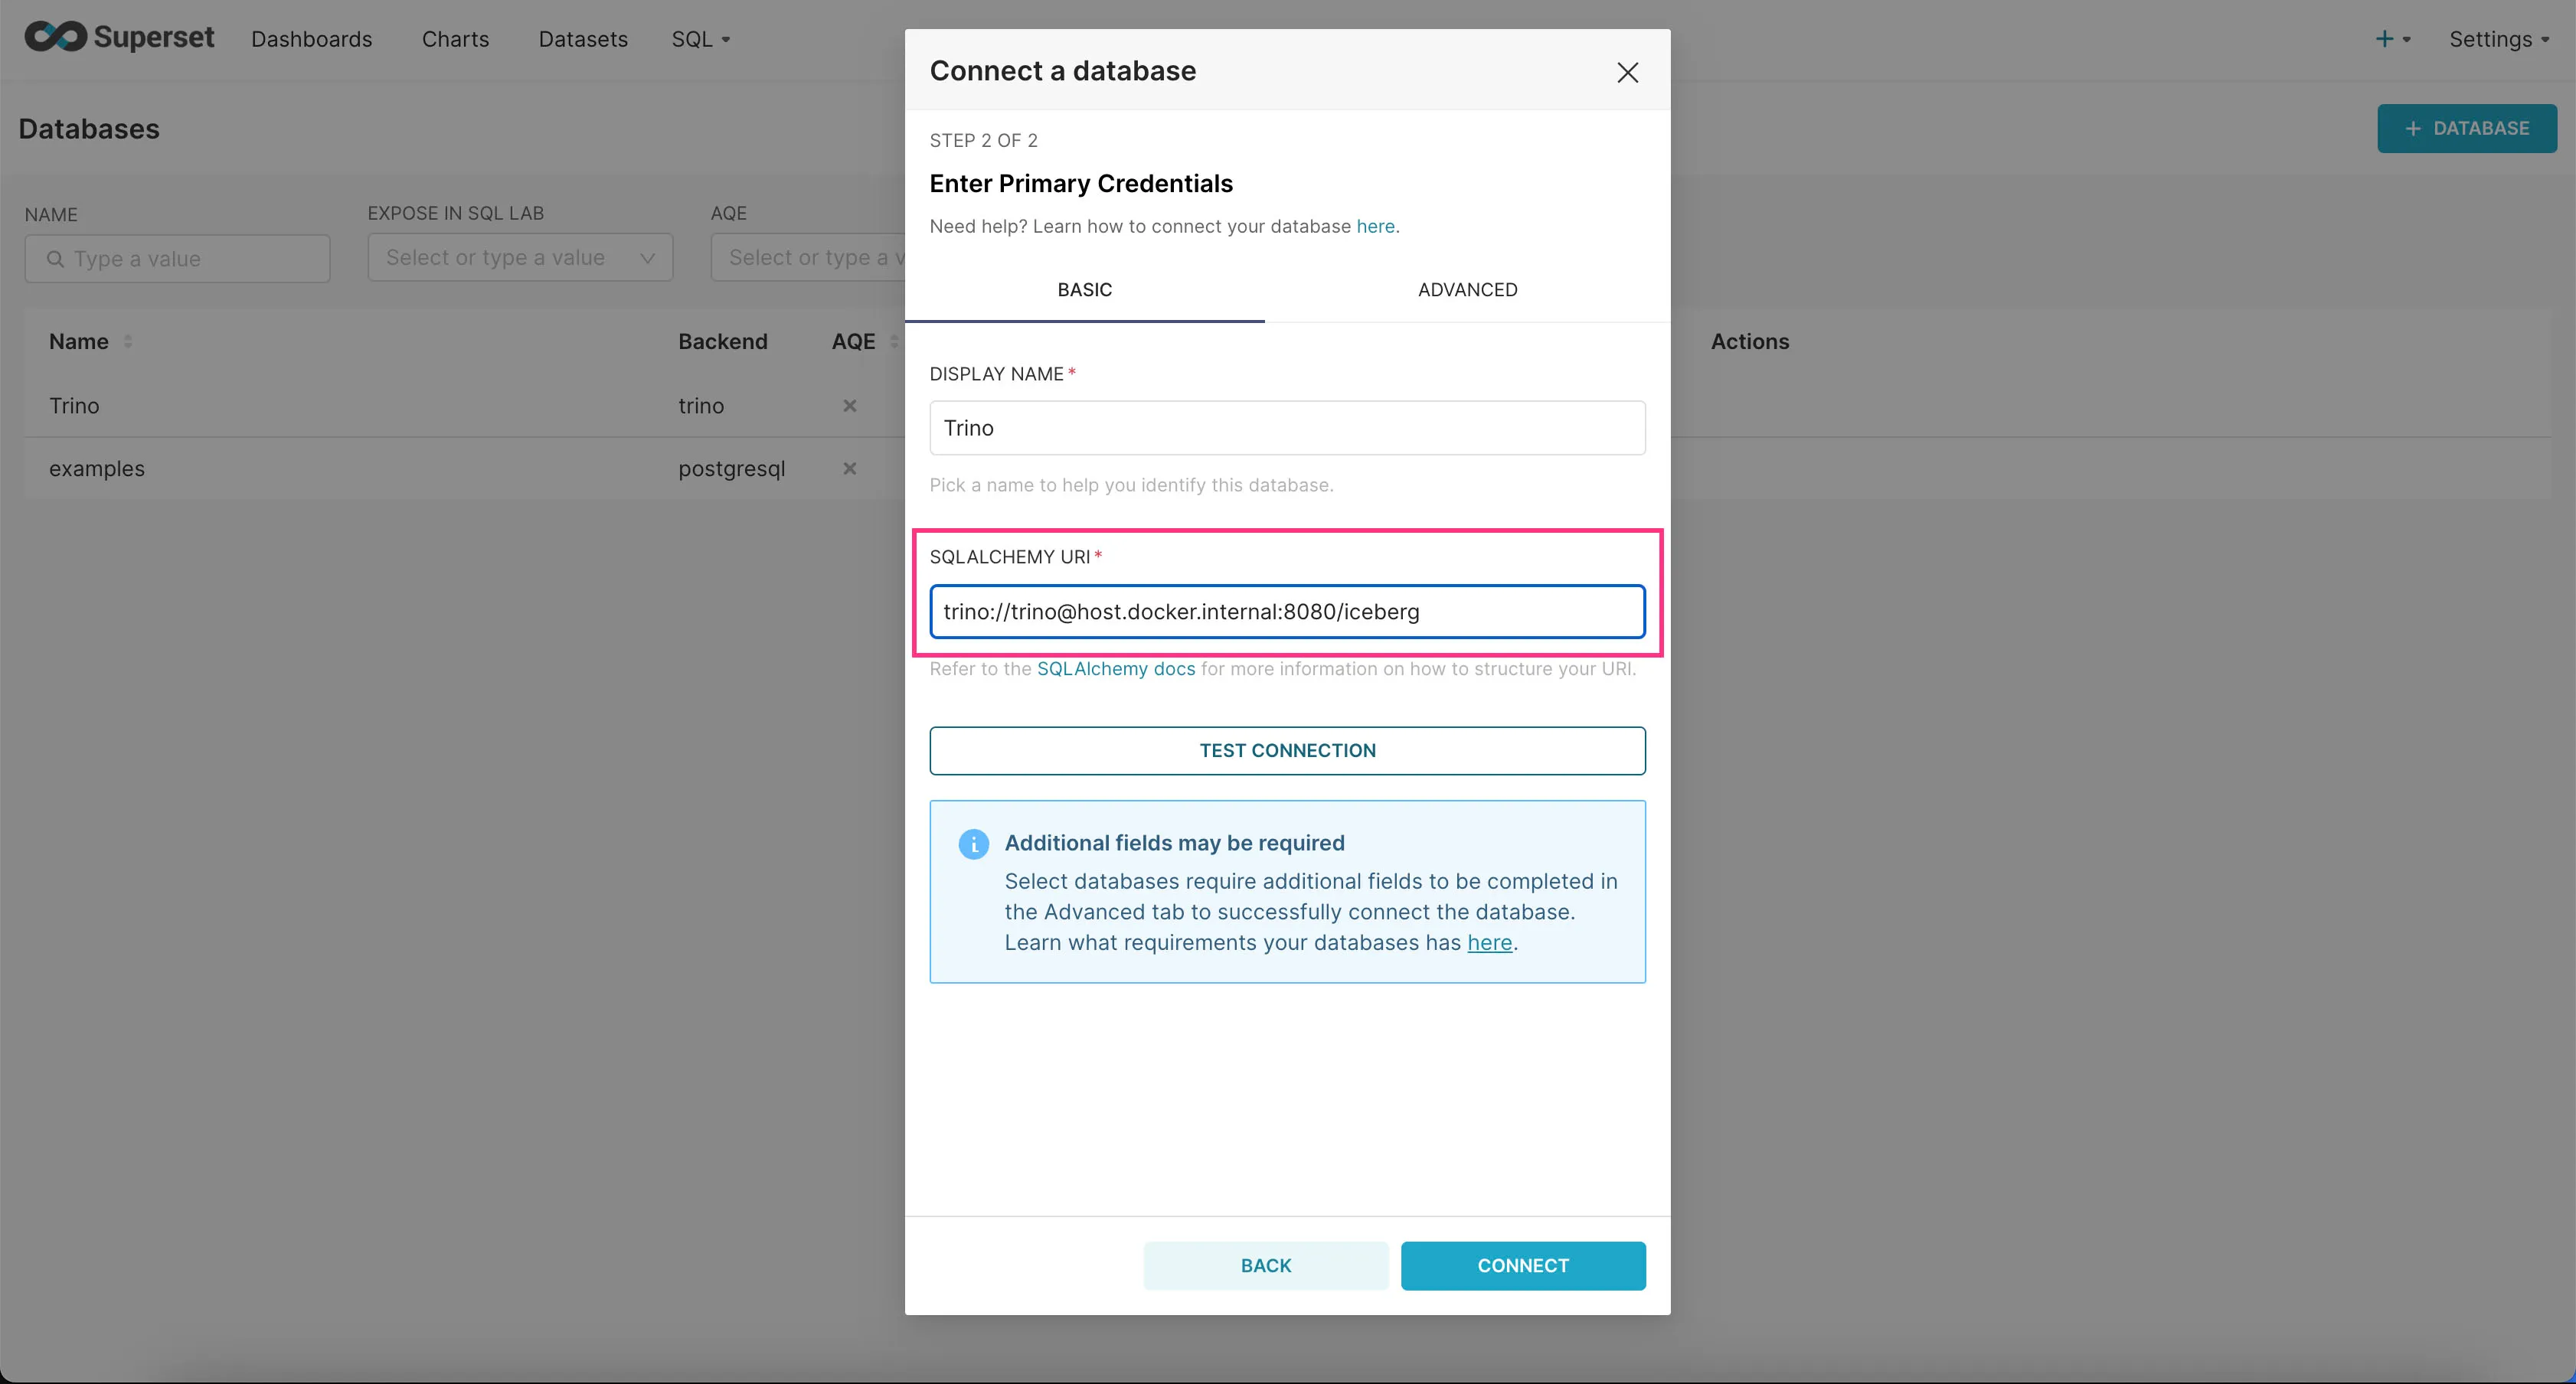
Now we need to add Trino as a database connection in Superset.
- Go to the “Settings” dropdown at the top right corner and click “Database Connections”.
- Click on the “+Database” button at the top right corner.
- Find “Trino” option in the “SUPPORTED DATABASES” select field near the bottom.
- In the “SQLALCHEMY URI” field, enter
trino://trino@host.docker.internal:8080/icebergand then click “Connect”.
Trino should now be connected to Superset.
Add an Example Dashboard
Now that we’ve connected Superset to Trino, let’s add an example dashboard we created for you.
- First download the example dashboard here.
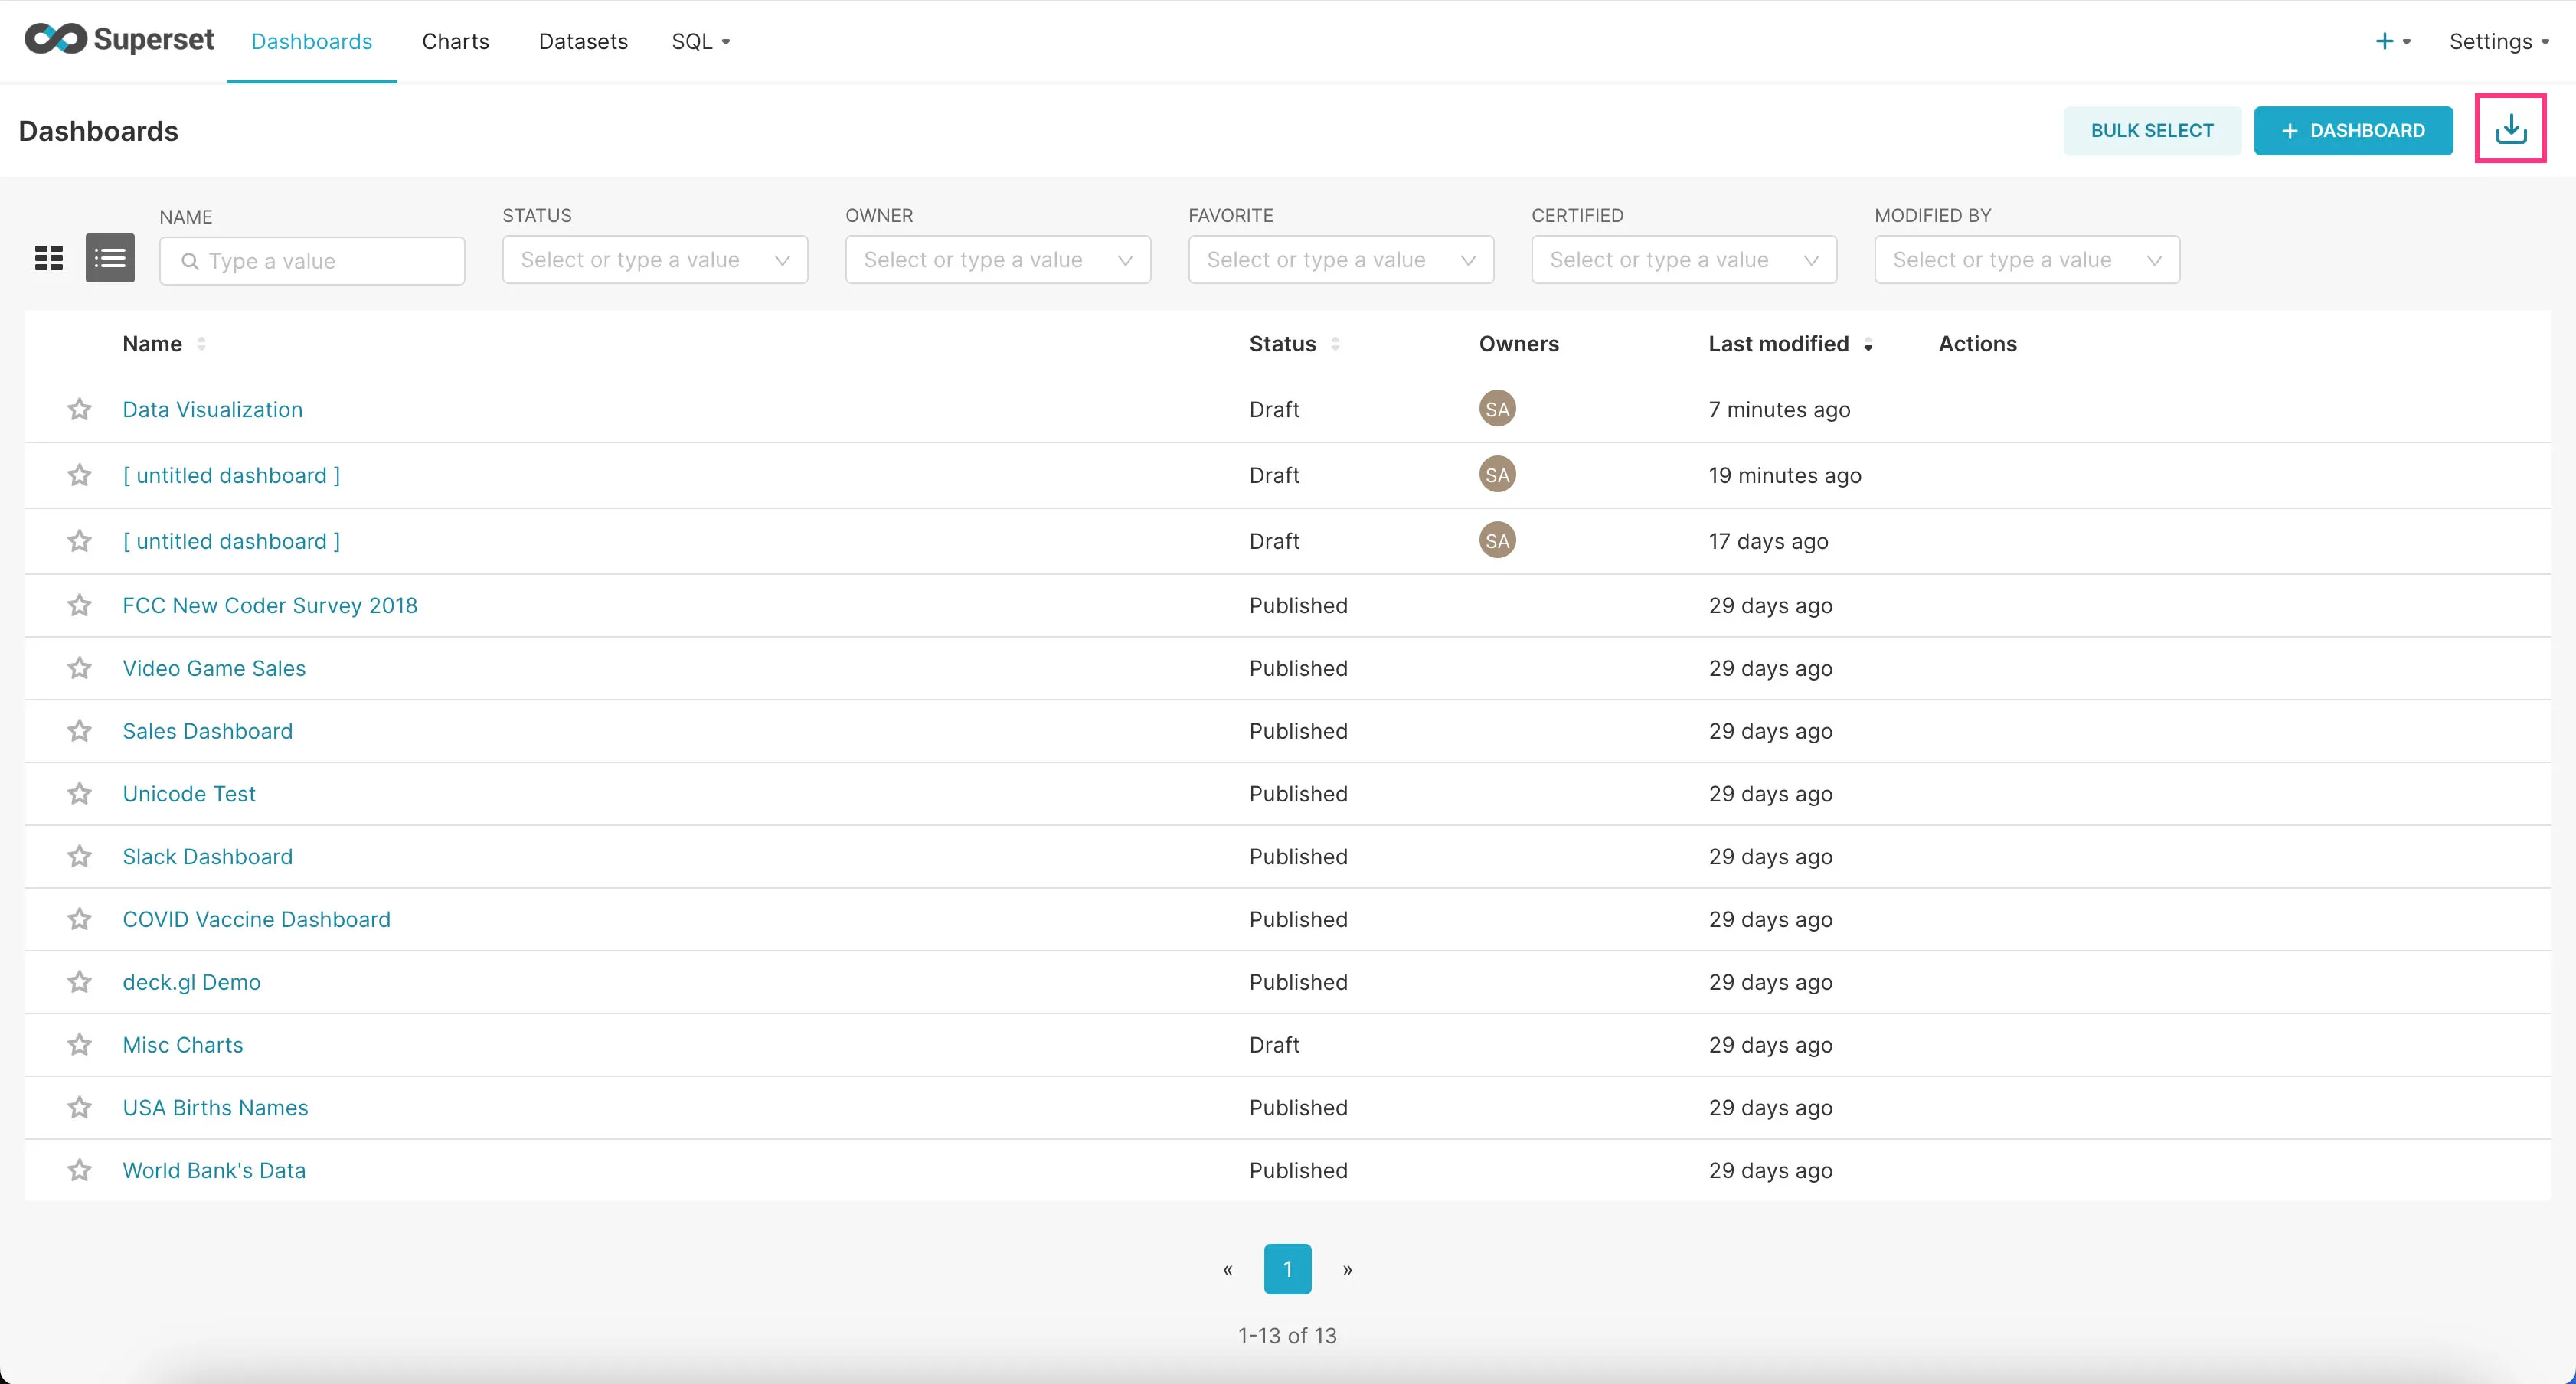
- Go to the “Dashboards” tab and click on the Import Dashboard icon at the top-right corner.
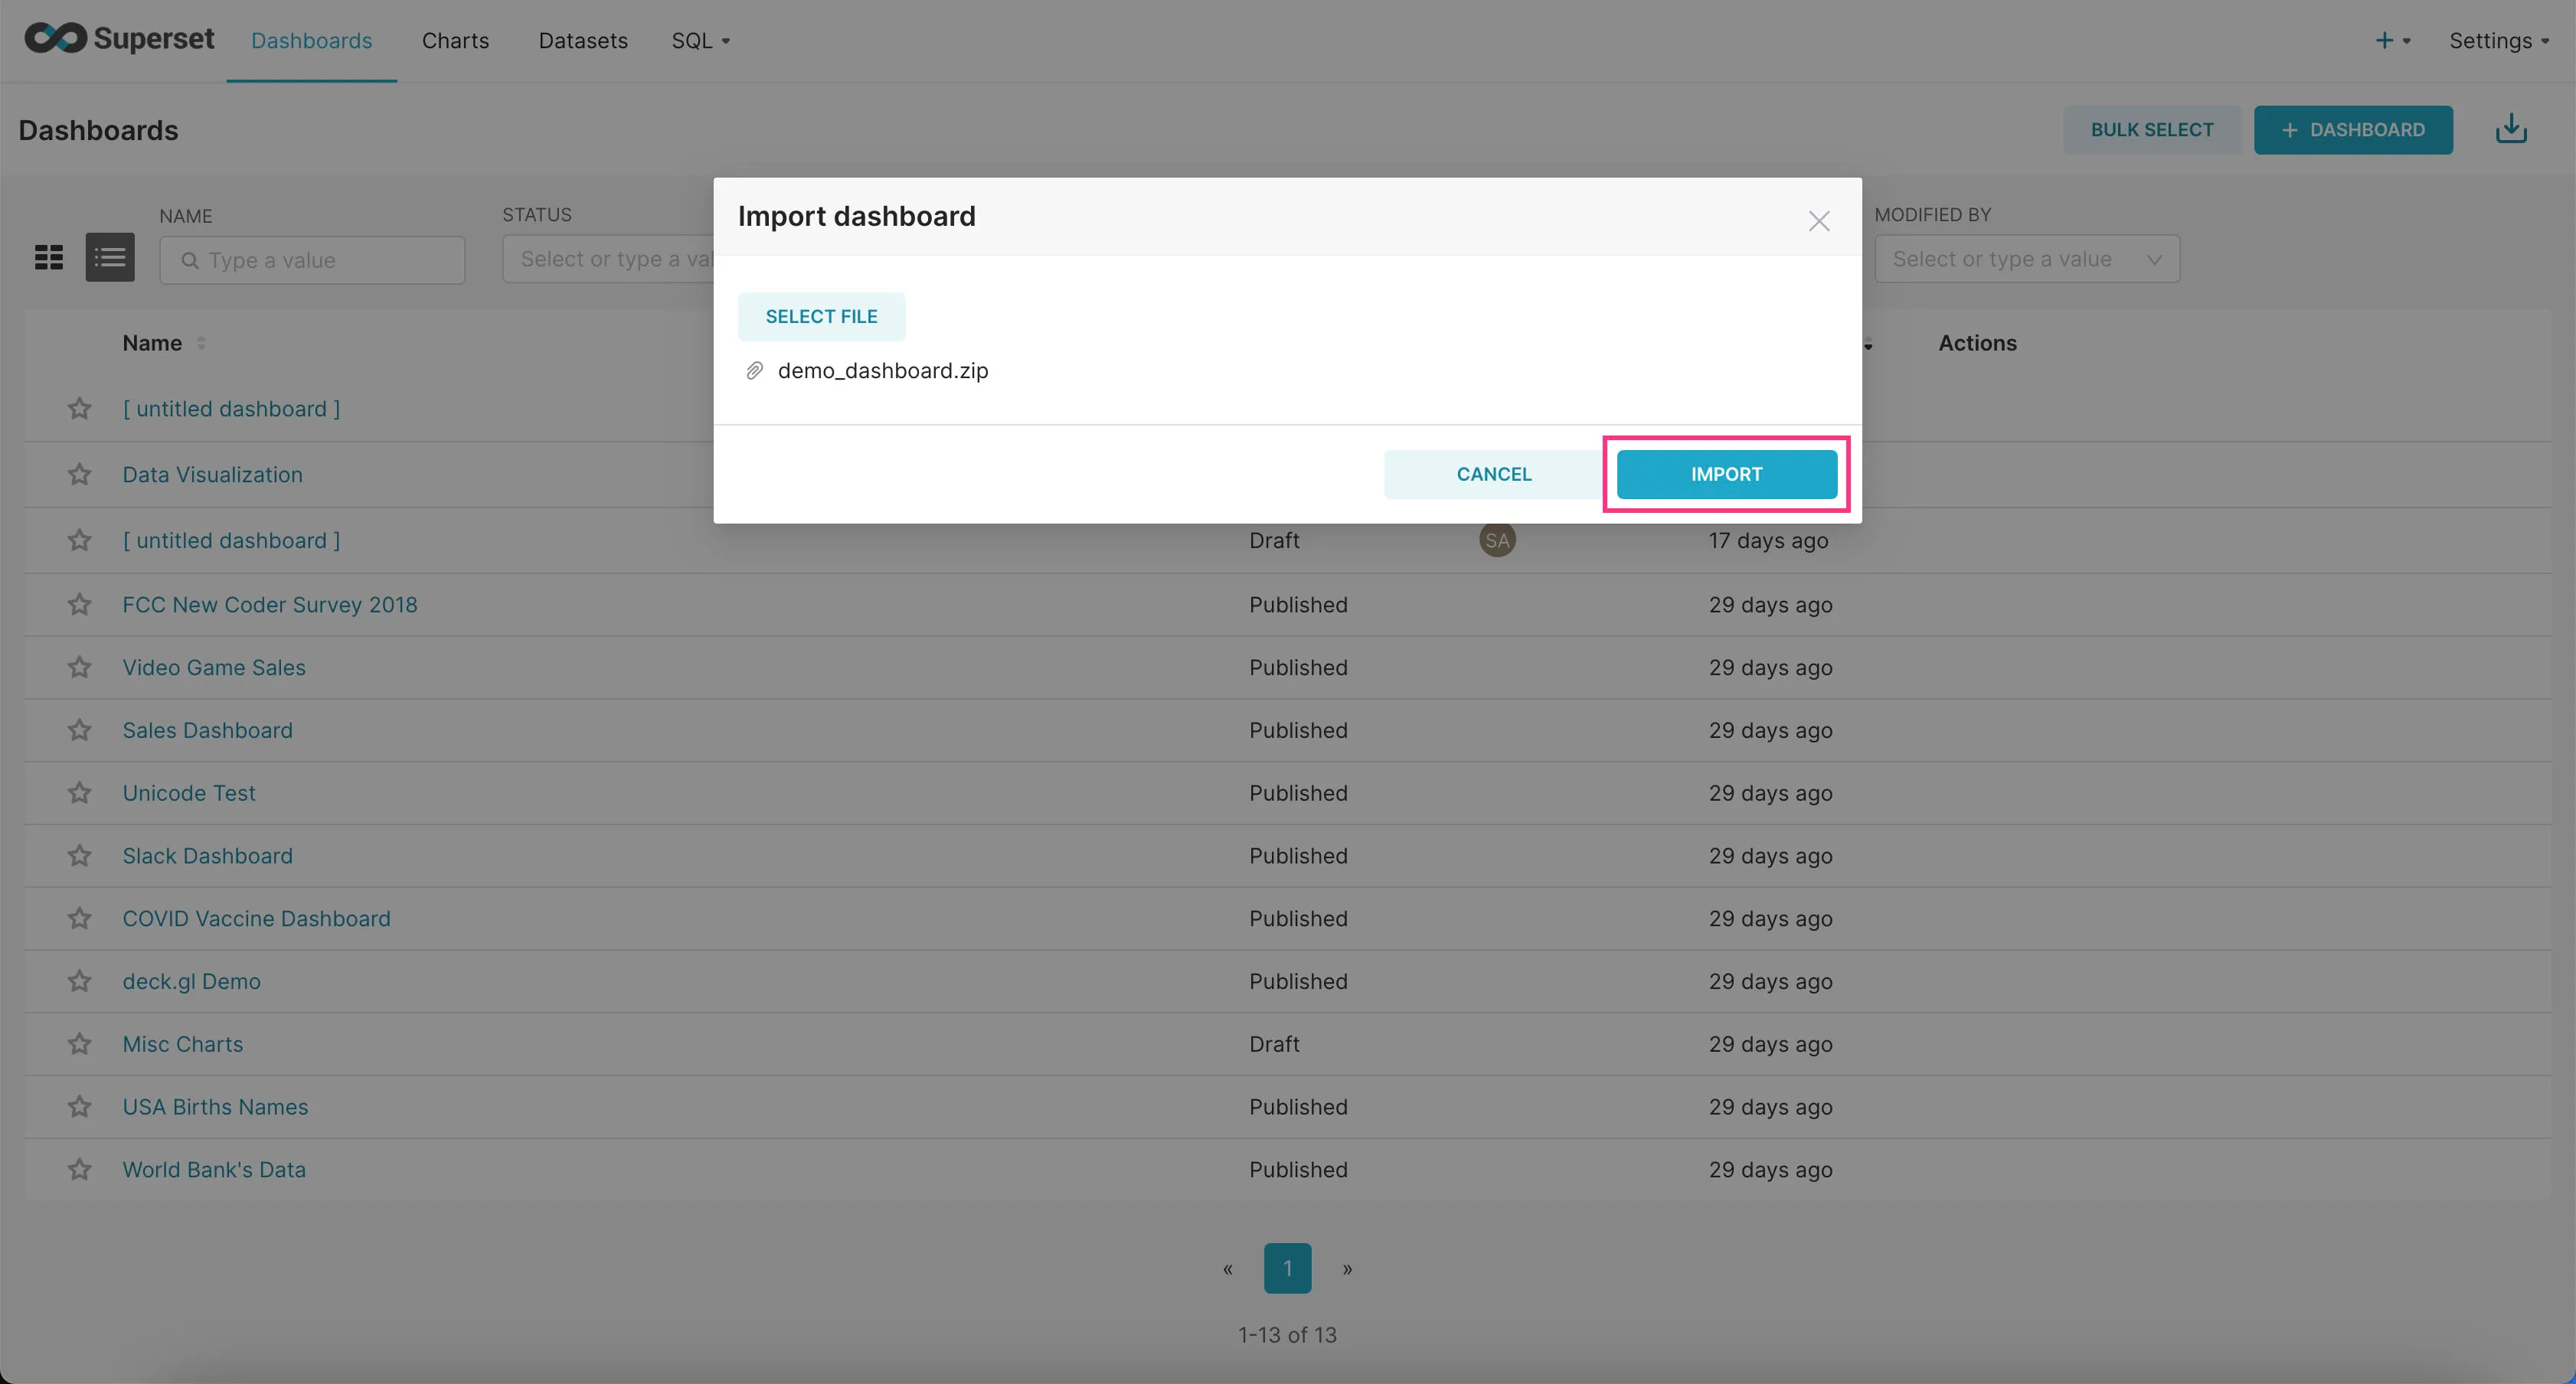
- Upload the downloaded zip file and click “Import”.
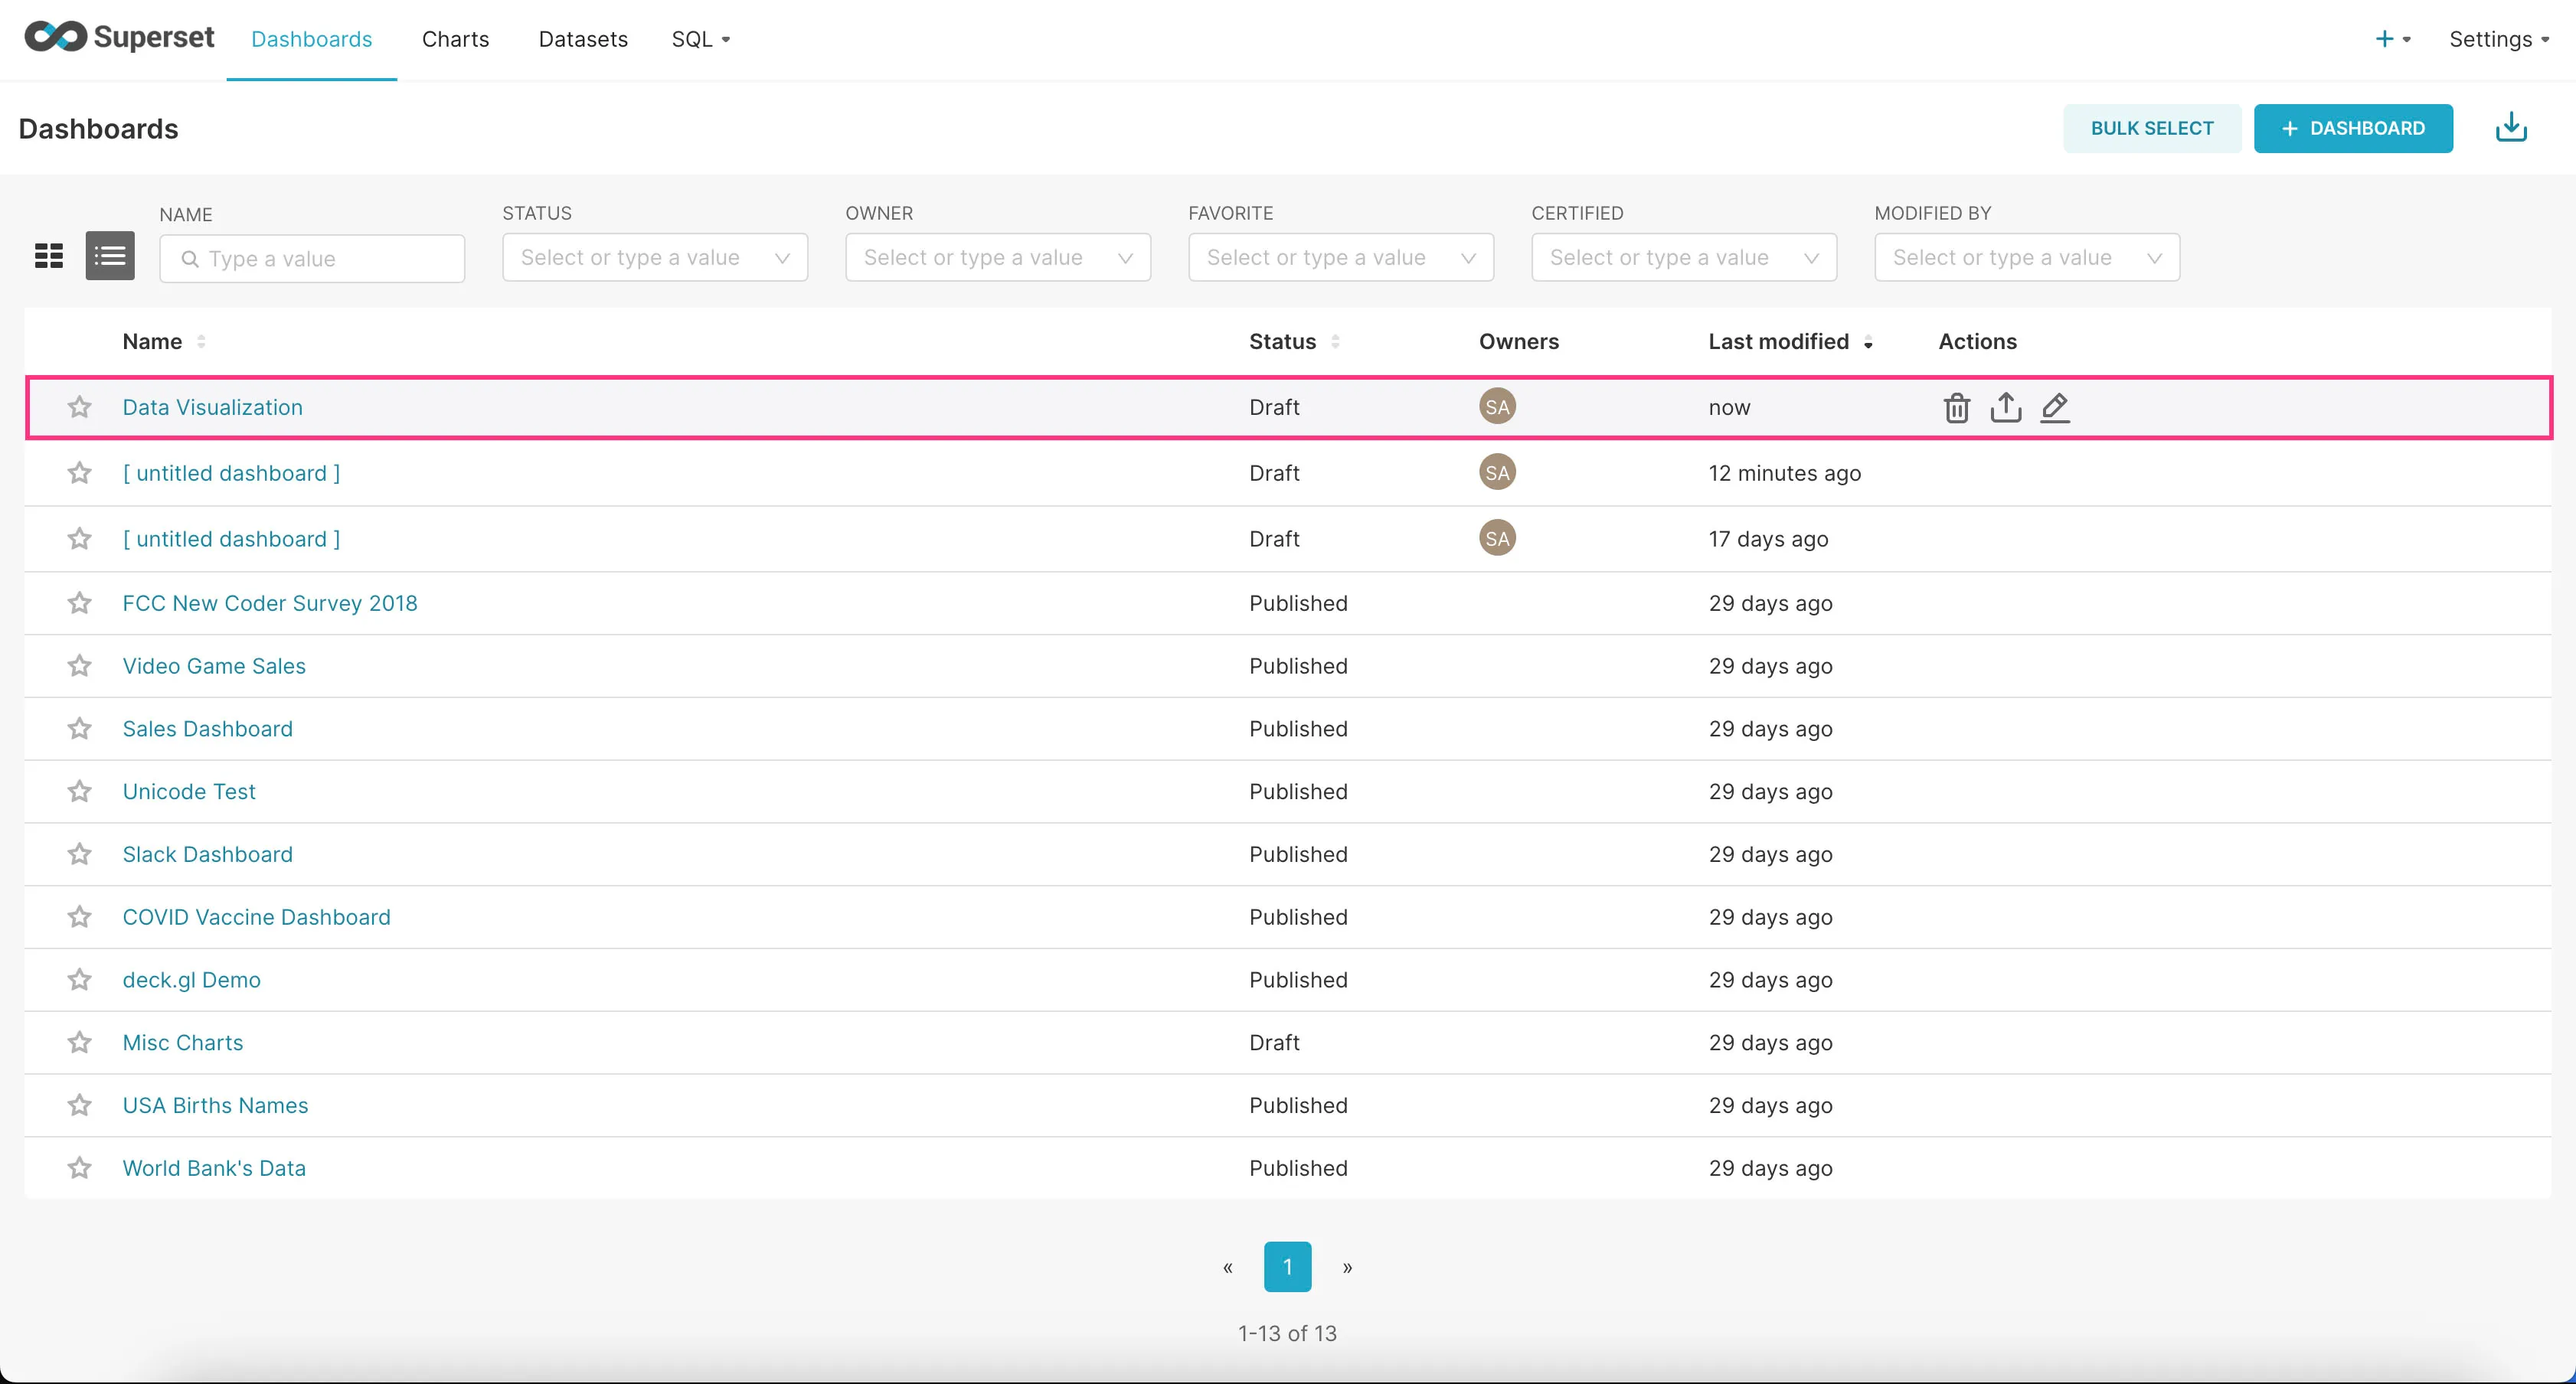
- Find the example dashboard you just added in the list of dashboards and click on it to view it.
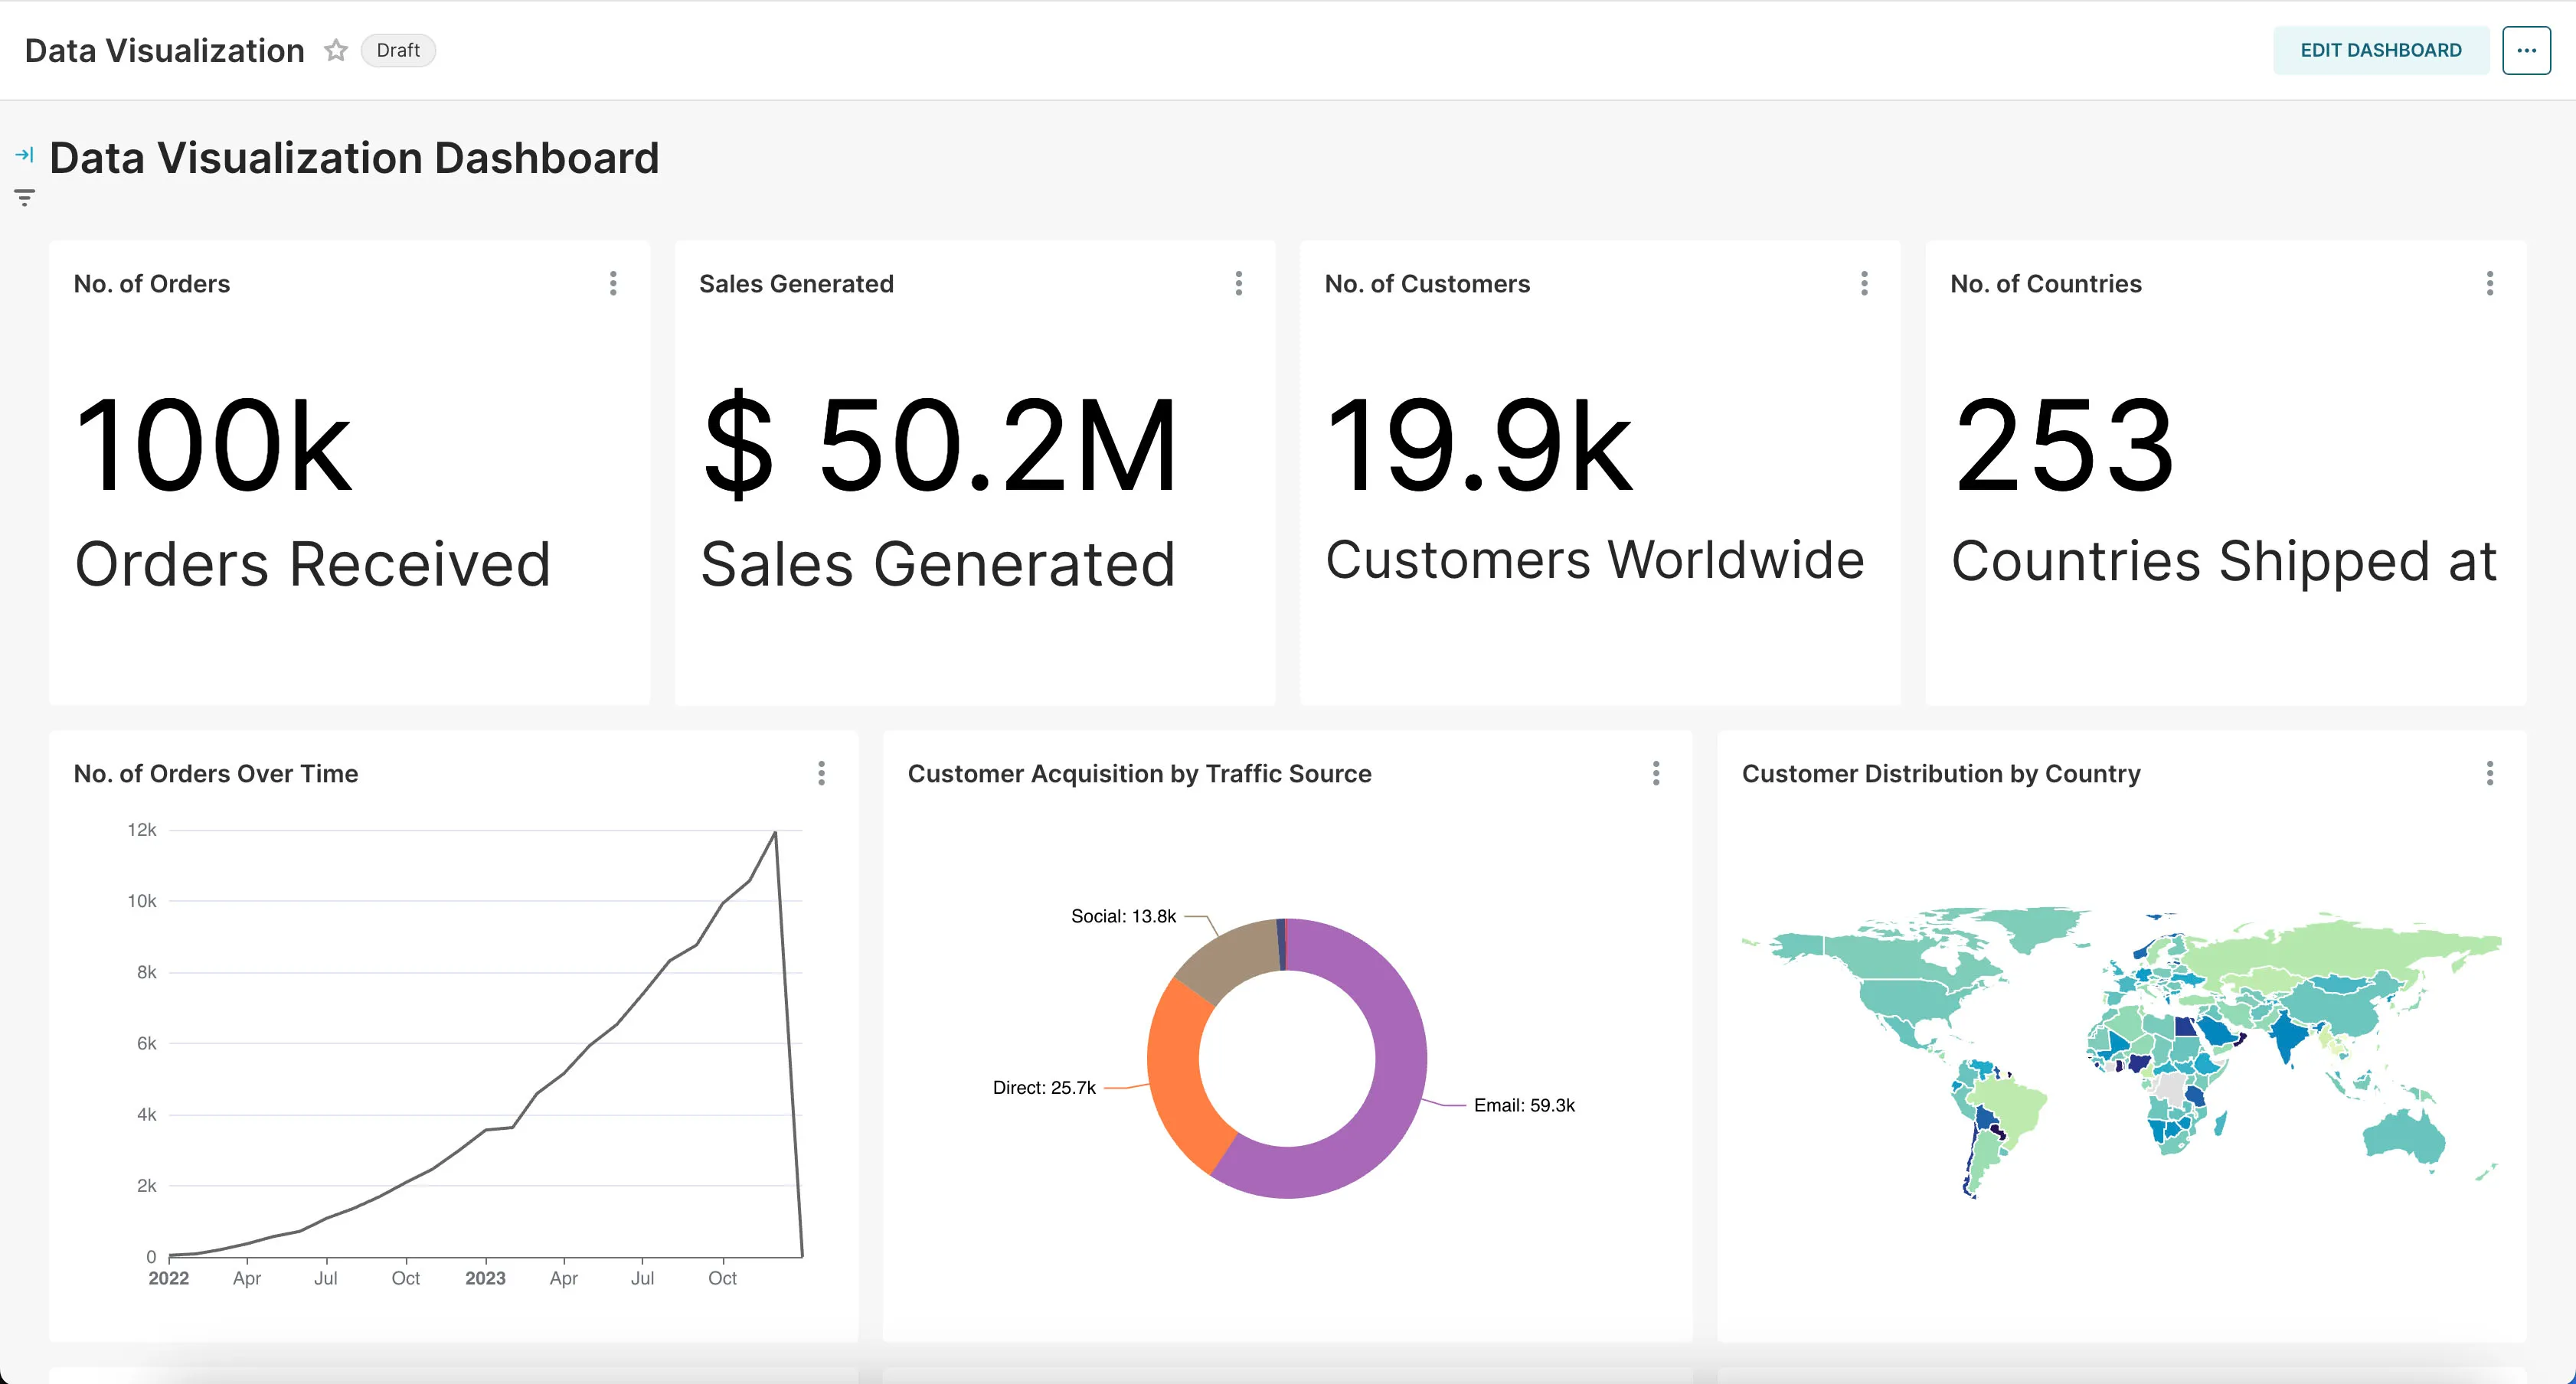
That’s it! You should now see a bunch of charts we created for you based on the example dataset.
Conclusion
As you can see, Sidetrek can dramatically reduce the amount of work it takes to run an end-to-end data pipeline.
I hope you enjoyed this series and learned a lot about building data pipelines from scratch!
Questions and Feedback
If you have any questions or feedback, feel free to join us on Slack and we’ll do our best to help!