End-to-End Data Pipeline Series: Tutorial 3 - Ingestion


Welcome back! This is the third post in a series where we’ll build an end-to-end data pipeline together.
Here’s where we’re at:
- Introduction to End-to-End Data Pipeline
- Data Storage with MinIO/S3 and Apache Iceberg
- Data Ingestion with Meltano (this post)
- Data Transformation with DBT and Trino - Part 1
- Data Transformation with DBT and Trino - Part 2
- Data Orchestration with Dagster
- Data Visualization with Superset
- Building end-to-end data pipeline with Sidetrek
If you want to view the code for this series, you can find it here. To view the progress up to this post, you can check out the ingestion branch.
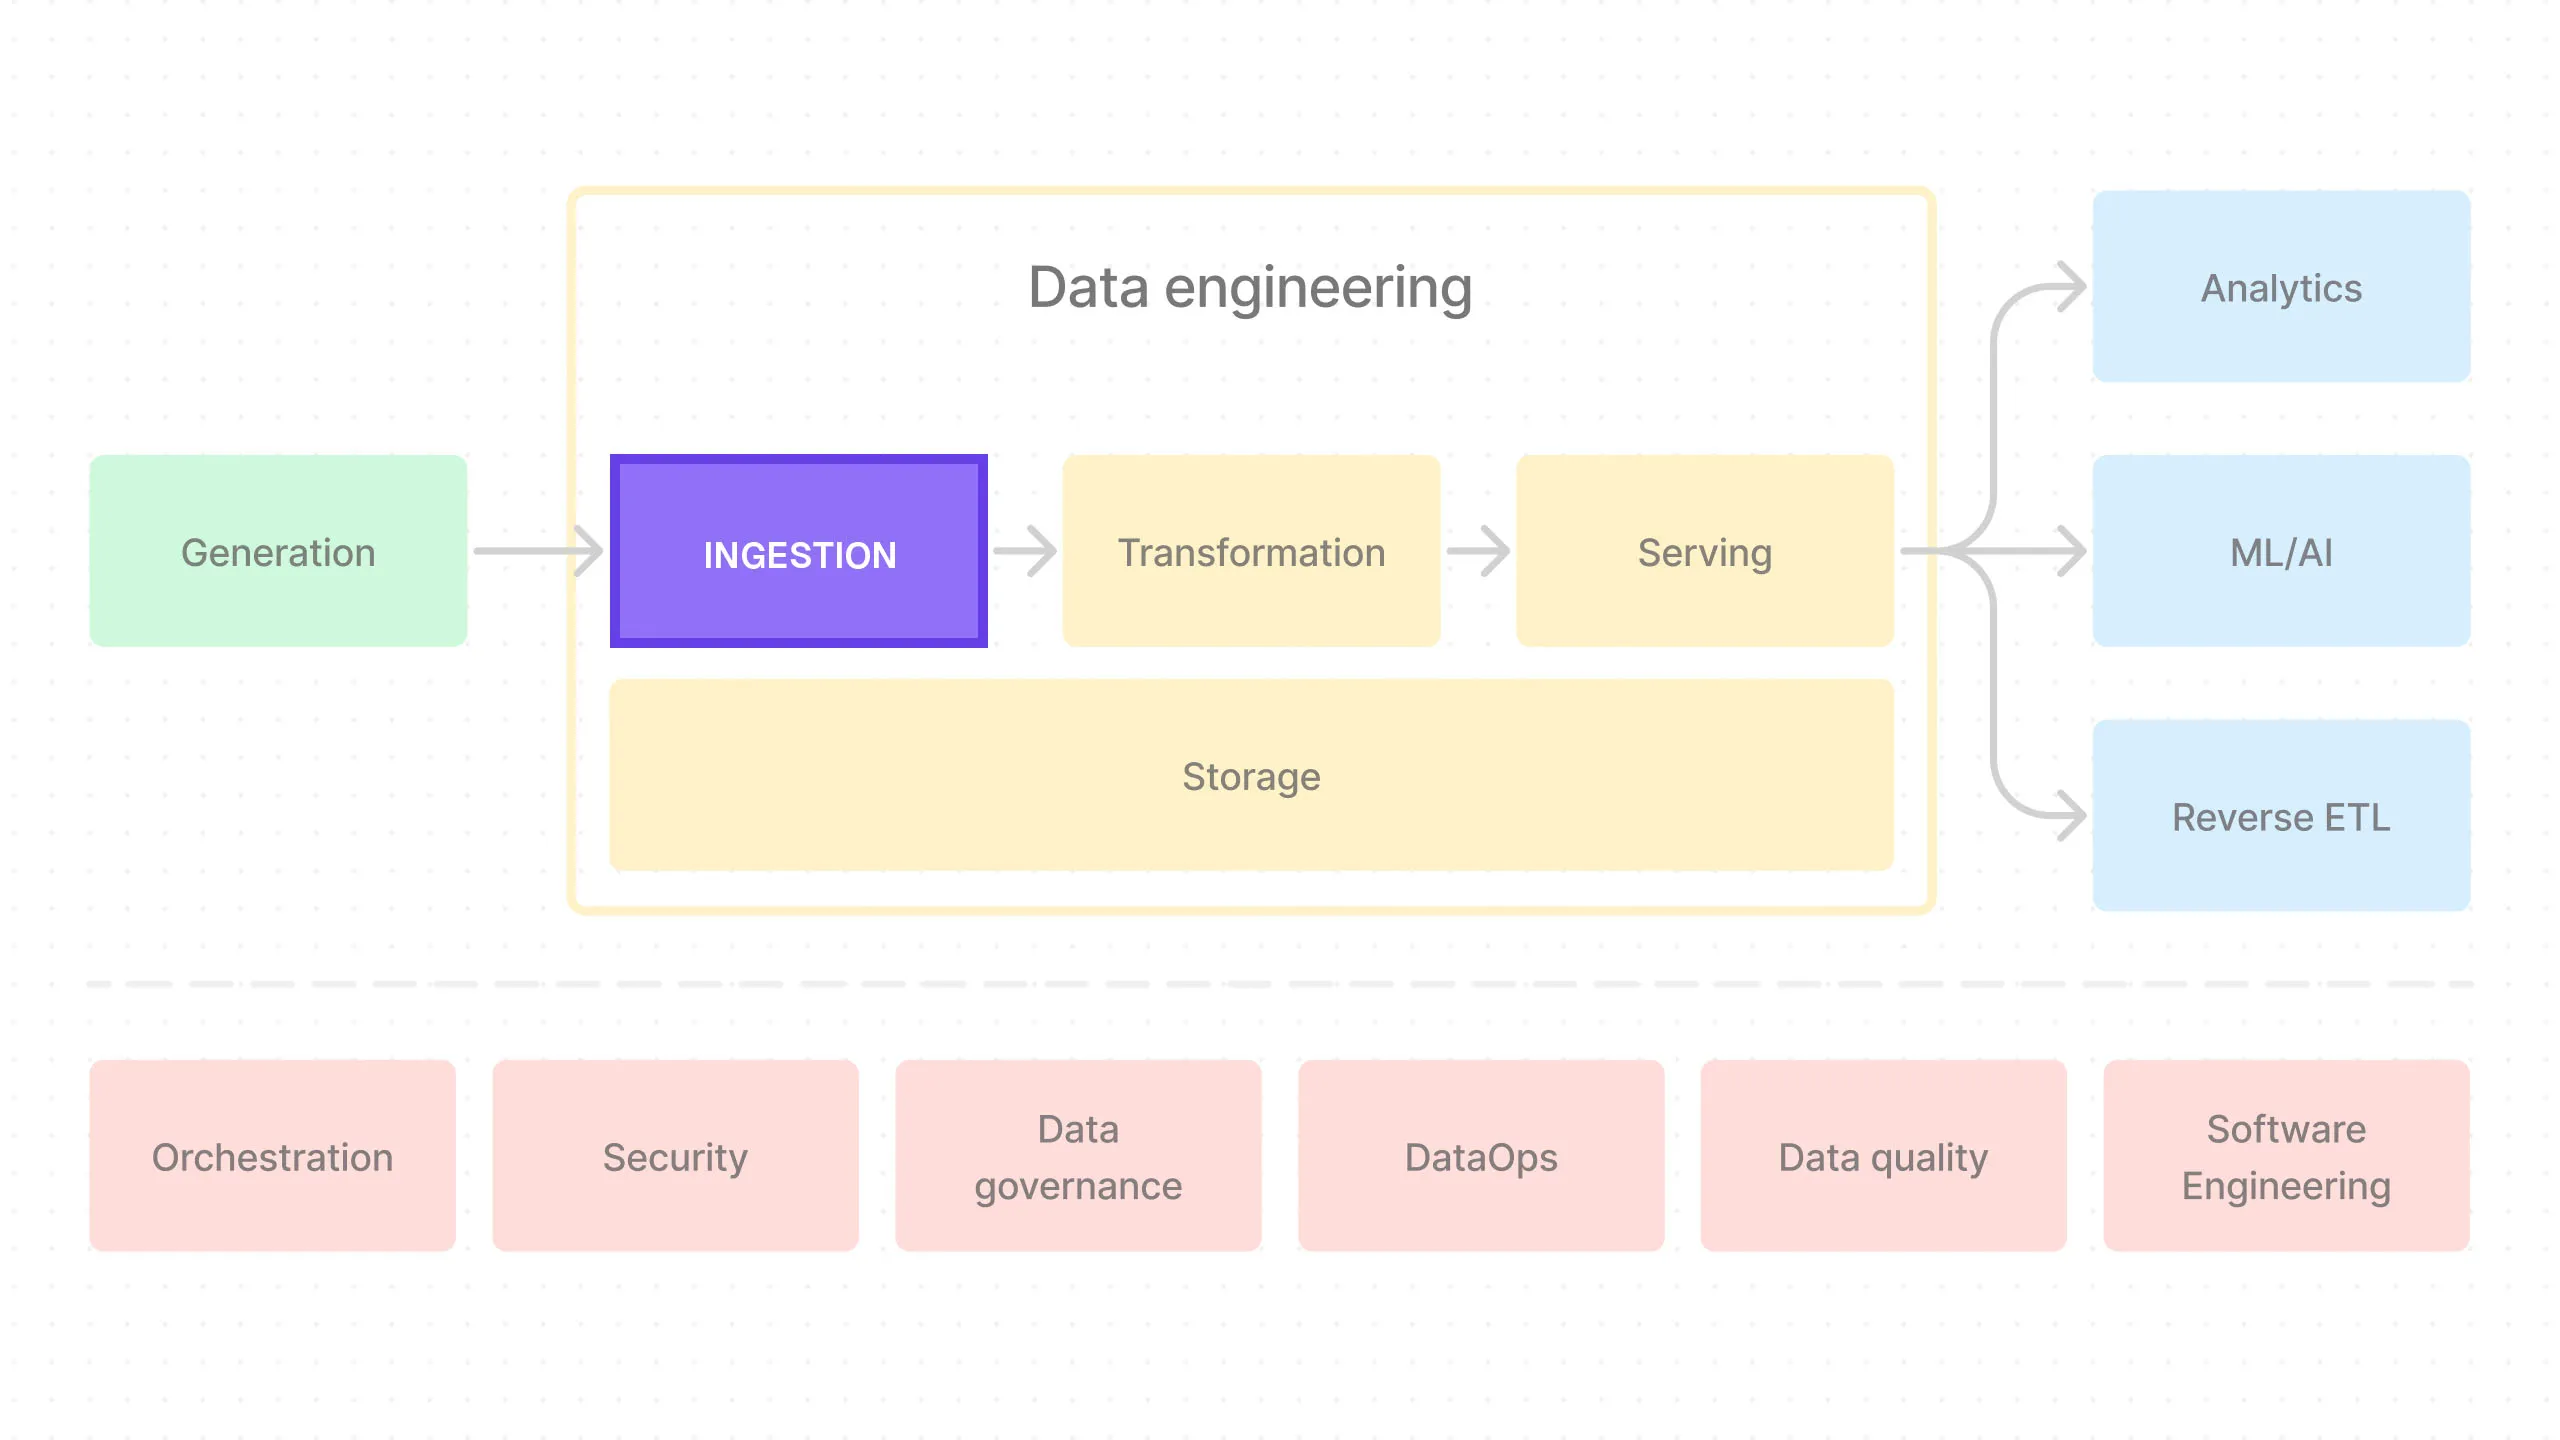
Today, we’re going to work on the ingestion part of the pipeline.
What is Ingestion?
Ingestion is the process of bringing data into the data pipeline. This is where we connect to the data sources, start pulling in data, and finally store it in our storage.
This is the EL (extract and load) part of the ELT/ETL process.
The Dataset
Since everyone understands how an e-commerce store works, we’ll use an e-commerce dataset as an example.
There are four tables: orders (100k rows), customers (20k rows), products (2k rows), and stores (200 rows). This emulates typical e-commerce data.
You can download this dataset here.
Unzip it and copy the resulting CSV files to the data/example directory in the inner project directory (i.e. /e2e_bi_tutorial/e2e_bi_tutorial/data/example).
Each of the tables is in its own CSV file.
Meltano
We’ll be using Meltano as our ingestion tool.
Why Meltano?
To keep things simple, we’ll only be using the above CSV files as our data sources in this series, but in reality, you could have many more sources:
- Databases (Postgres, MySQL, etc.)
- APIs (Google Analytics, Shopify, etc.)
- Cloud services (S3, Google Cloud Storage, etc.)
- Streaming data (Kafka, Kinesis, etc.)
- …and many more!
So a “managed connector” like Meltano is a great tool to have. It comes with pre-built connectors to hundreds of data sources, so you don’t have to hand-code each one.
If you have any experience working with external APIs, you know how much of a pain it can be to build each of these connections. You have to learn and hand-code each service with its own API conventions, OAuth, rate limits, etc.
It’s not just about the initial implementation but also about maintaining them. APIs change constantly, and new data sources are added all the time. Whenever this happens, you have to manually fix your connections.
Most data engineers would agree that this is not a value added activity - it’s a necessary plumbing.
Of course, in practice, these managed connectors don’t always work perfectly so you might still have to do some hand-coding. But they definitely make your job easier.
Batch vs Streaming Data Ingestion
Note that for the business analytics use cases we’re exploring in this series, batch ingestion is enough.
For our use case, it’s OK to ingest data once every few hours or even once a day because our data consumers don’t need real-time data. They want to know things like last month’s sales, the number of active users last week, etc.
If you’re working on a use case that requires real-time data (if you’re building Uber, for example), you’ll need a different set of tools like Kafka, Flink, etc.
This is not relevant in this series, but you should be aware of this distinction. Meltano is a batch ingestion tool (at least as of today).
Set Up Meltano
Before we set up Meltano, here’s a quick review of the project directory structure we’ll be building:
e2e_bi_tutorial
├── .venv
├── superset
├── trino
└── e2e_bi_tutorial
    ├── dagster
    ├── data
    ├── dbt
    └── meltano
Let’s first cd into the inner project directory:
Update Poetry Project’s Python Version
First we need to make sure we have the right python version for the poetry project.
In the pyproject.toml file, update the python line to python = "~3.10.0":
...
[tool.poetry.dependencies]
python = "~3.10.0"
...
Then run poetry lock to update the lock file with the new Python version:
NOTE: Depending on the Python version your machine defaults to, you might have to use another version. We recommed you use 3.10 or 3.11. Both should work fine.
OK, we’re ready to move onto package installations.
Install Meltano
We need to first install meltano CLI, which is a Python package.
BUT! There’s currently a bug that prevents Meltano from working with DBT if we don’t install DBT first!
It has to do with dependency conflicts between Meltano and DBT because they’re using different incompatible versions of snowplow tracker.
So to avoid this issue, we’re going to be installing DBT related packages first.
We need to install dbt-core and dbt-trino packages:
We can now install Meltano:
Initialize a Meltano Project
Now we can use meltano CLI to initialize a Meltano project:
Notice how we’re using poetry run to run the Meltano CLI.
This is because we’re using Poetry to manage our Python dependencies. We want to use the meltano package we installed in the Poetry virtual environment.
OK, now let’s cd into the Meltano project directory:
Taps (Extractors) and Targets (Loaders)
Meltano uses the concept of “taps” and “targets” to extract and load data.
- Taps are extractors that are responsible for extracting data from the source.
- Targets are loaders that are responsible for loading data into the destination storage.
Since we’re using CSV files as our data sources and Iceberg as our data lakehouse (storage), we’ll be using the tap-csv extractor and the target-iceberg loader.
Add the Extractor (tab-csv)
To install the extractor, you can run this command:
See the Meltano documentation for more information on how to work with Meltano.
Once the extractor is installed, it needs to be configured. Open up the meltano.yml file and update the plugins section like this:
...
plugins:
  extractors:
    - name: tap-csv
      variant: meltanolabs
      pip_url: git+https://github.com/MeltanoLabs/tap-csv.git
      config:
        csv_files_definition: extract/example_csv_files_def.json
csv_files_definition field lets Meltano know where to find the CSV files.
Now we need to add this file:
[
  { "entity": "orders", "path": "../data/example/orders.csv", "keys": ["id"] },
  { "entity": "customers", "path": "../data/example/customers.csv", "keys": ["id"] },
  { "entity": "products", "path": "../data/example/products.csv", "keys": ["id"] },
  { "entity": "stores", "path": "../data/example/stores.csv", "keys": ["id"] }
]
It basically tells Meltano where to find the CSV files and what the primary keys are for each table.
Note that the path field is relative to the meltano project directory.
Add the Loader (target-iceberg)
Once the extractor is set up, it’s time to add the loader. This is where you tell Meltano where to load the data to.
In this series, we’re loading the data into Iceberg tables. The problem is, Meltano currently does not have a built-in loader for Iceberg. So we’ve built a custom one you can use.
You don’t have to do this often because Meltano has built-in loaders for most common data storage systems.
But as is the case with new tools, sometimes you don’t get exactly what you need and have to do some extra work. Call it the cost of being at the cutting edge! 😄
When prompted, enter the following information:
- namespace: target_iceberg (default)
- pip_url: git+https://github.com/SidetrekAI/target-iceberg
- executable: target-iceberg
- settings: leave empty (default)
Note that you typically don’t need the --custom flag if you’re using one of the existing Meltano loaders.
Now we need to configure the extractor. In meltano.yml, update the loaders plugin like this:
...
plugins:
  extractors:
    ...
  loaders:
    - name: target-iceberg
      namespace: target_iceberg
      pip_url: git+https://github.com/SidetrekAI/target-iceberg
      executable: target-iceberg
      config:
        add_record_metadata: true
        aws_access_key_id: $AWS_ACCESS_KEY_ID
        aws_secret_access_key: $AWS_SECRET_ACCESS_KEY
        s3_endpoint: http://localhost:9000
        s3_bucket: lakehouse
        iceberg_rest_uri: http://localhost:8181
        iceberg_catalog_name: icebergcatalog
        iceberg_catalog_namespace_name: raw
It requires AWS credentials, an S3 endpoint (which is a Minio endpoint in our case since we’re using Minio as an S3 replacement for our development environment), and Iceberg-related configurations.
add_record_metadata is a flag that tells the loader to add metadata to the records. This is useful for tracking when the record was loaded, etc.
Add .env File
Before we run the ingestion, we need to add an .env file to the Meltano project directory.
This file will contain the environment variables that Meltano needs to run.
AWS_ACCESS_KEY_ID=admin
AWS_SECRET_ACCESS_KEY=admin_secret
Run Meltano Ingestion
Now that we have the Meltano extractor and loader installed and configured, we can run the ingestion.
But before we do, we need to make sure MinIO and Iceberg is running (-d runs it in the background):
Now you can run the ingestion by executing the following command:
Check the Data in MinIO
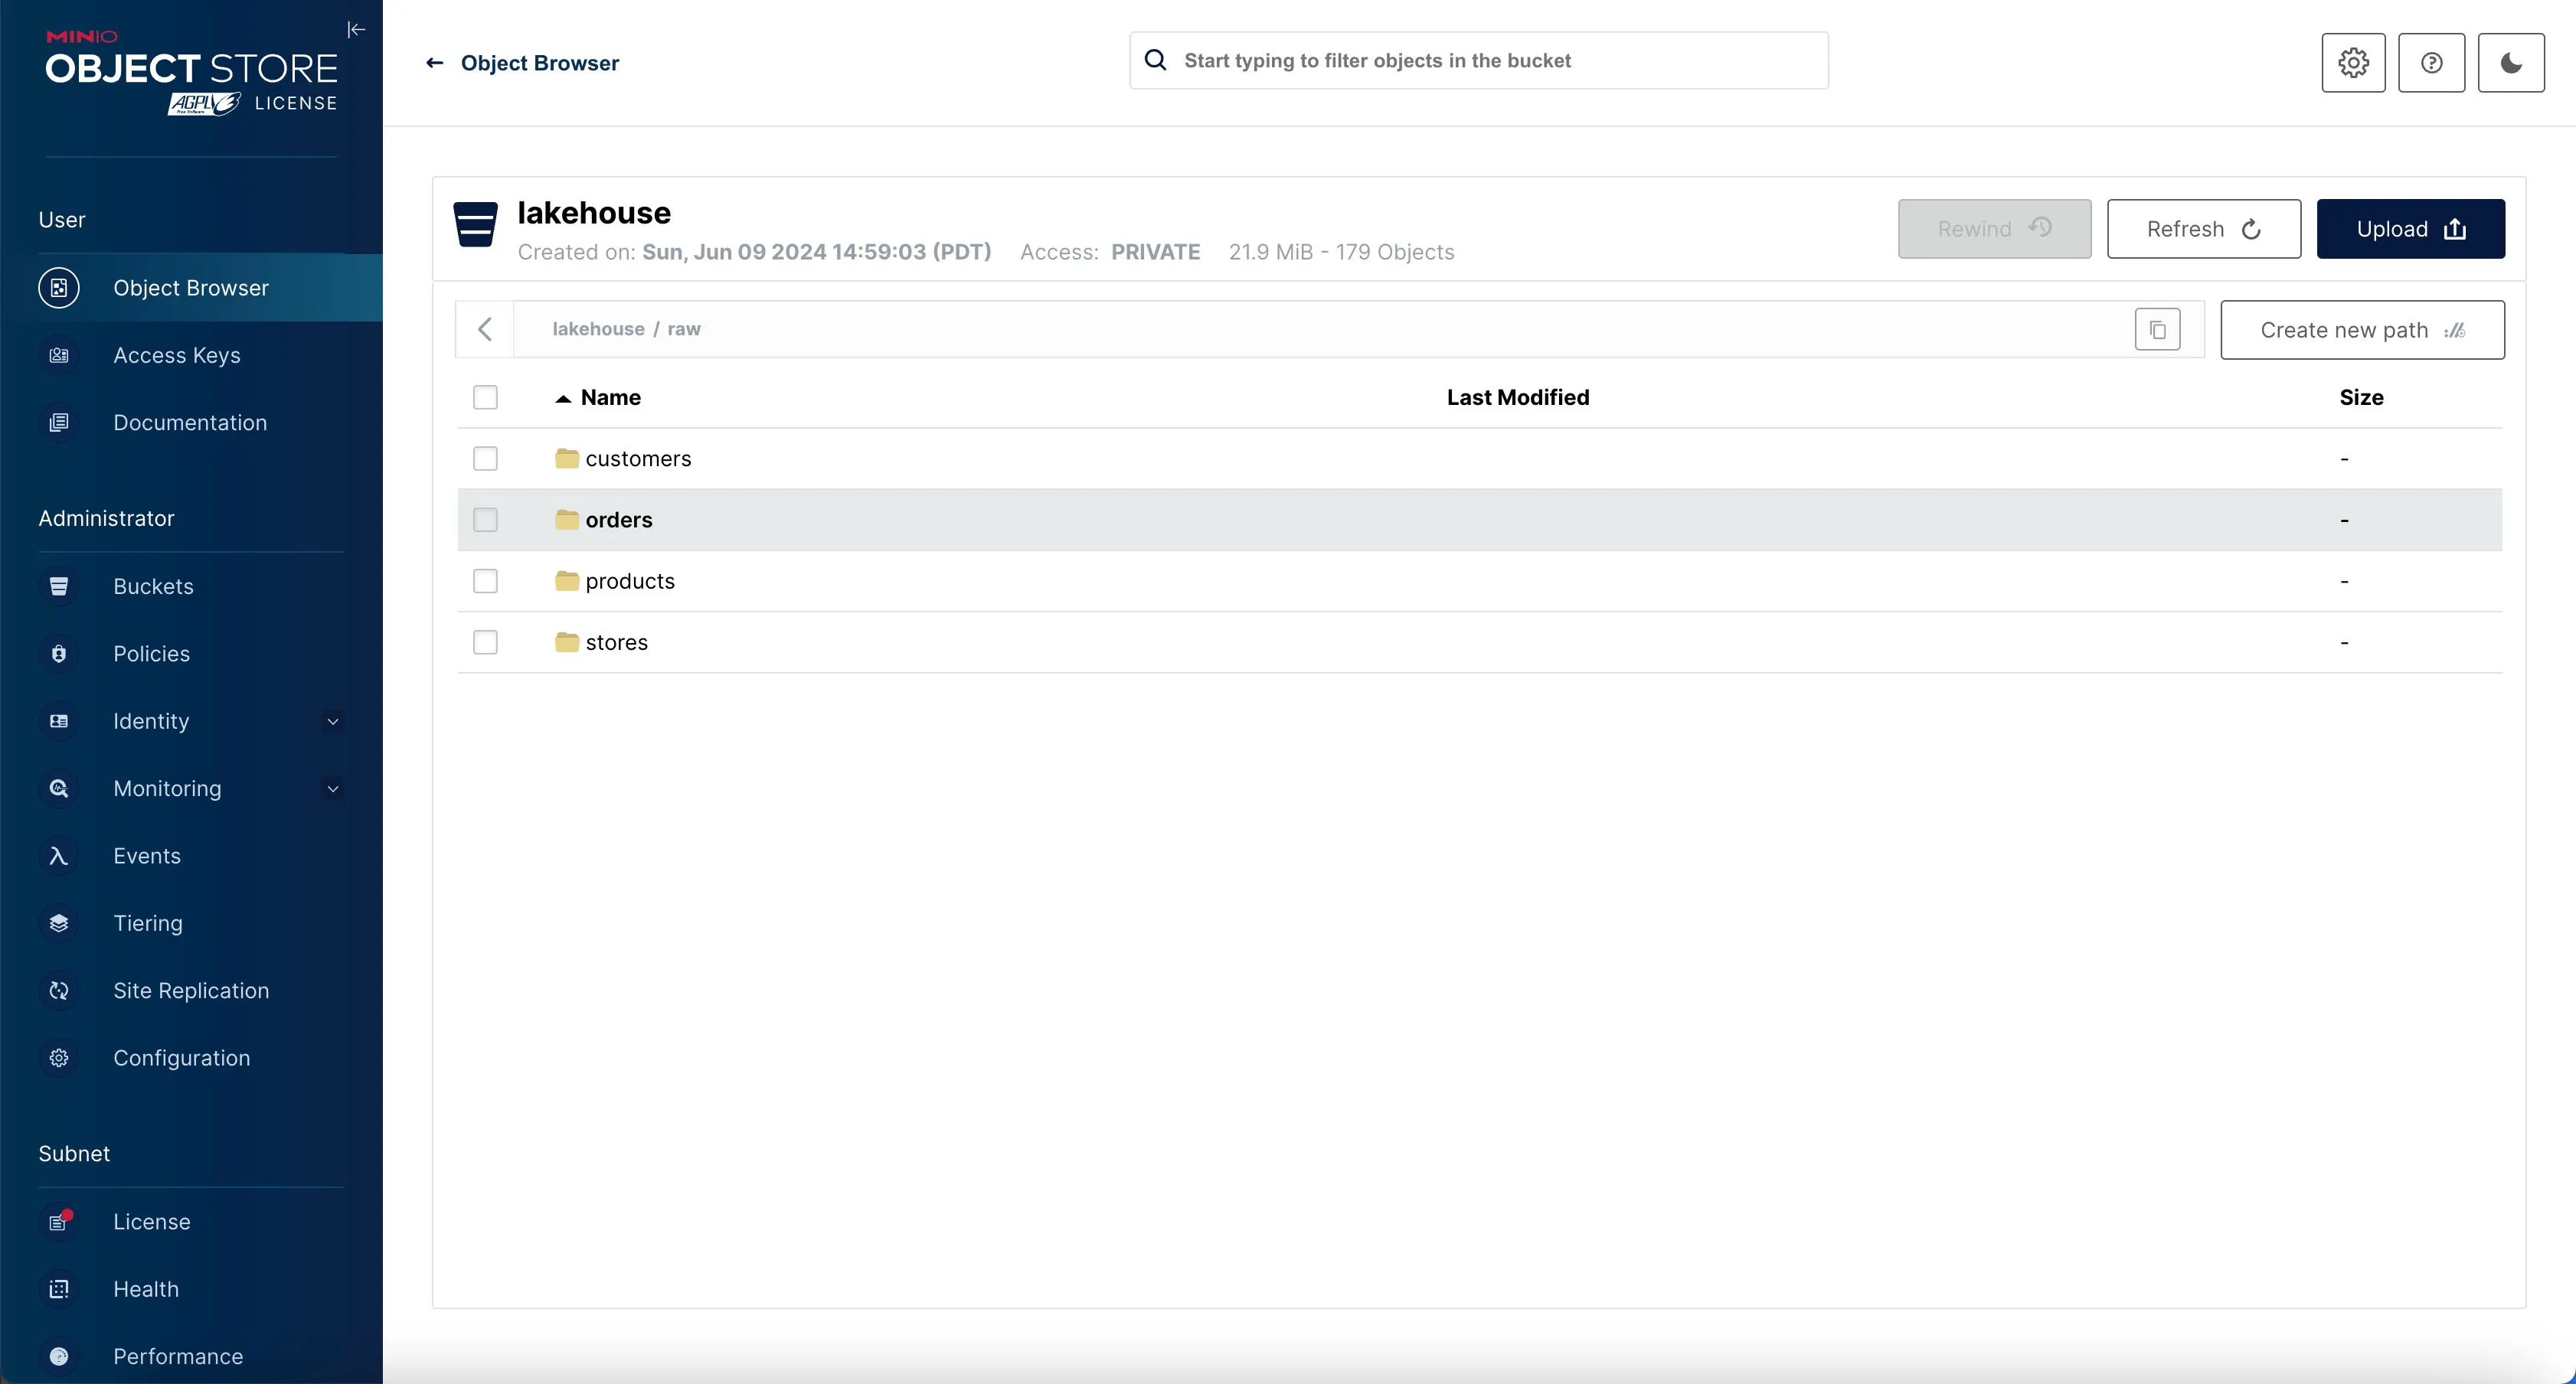
Now let’s open up the MinIO console at http://localhost:9001 and check if the data has been ingested (if you forgot, login credentials are admin and admin_secret).
You should see the new folders in the lakehouse/raw directory.

If you click on any of the directories - for example, orders - you should see data and metadata folders.
The data folder contains the actual data files, and the metadata folder contains the Iceberg metadata files that allow us to query the raw data as tables.
We cannot query the actual rows yet though because we don’t have our query engine (Trino) set up.
We’ll be doing that in the next post.
Clean Up
You can stop and remove all the docker services:
Conclusion
In this post, we’ve downloaded a sample e-commerce dataset and set up Meltano to ingest data from CSV files into Iceberg tables.
We looked at what taps and targets are in Meltano and how to configure them.
In the next post, we’ll set up Trino to query the data we’ve ingested.
Stay tuned!
Questions and Feedback
If you have any questions or feedback, feel free to join us on Slack and we’ll do our best to help!